Home The Donor Tear Down Engine Transmission Rear End Wiring
Cooling A/C Fuel Exhaust Links Brakes
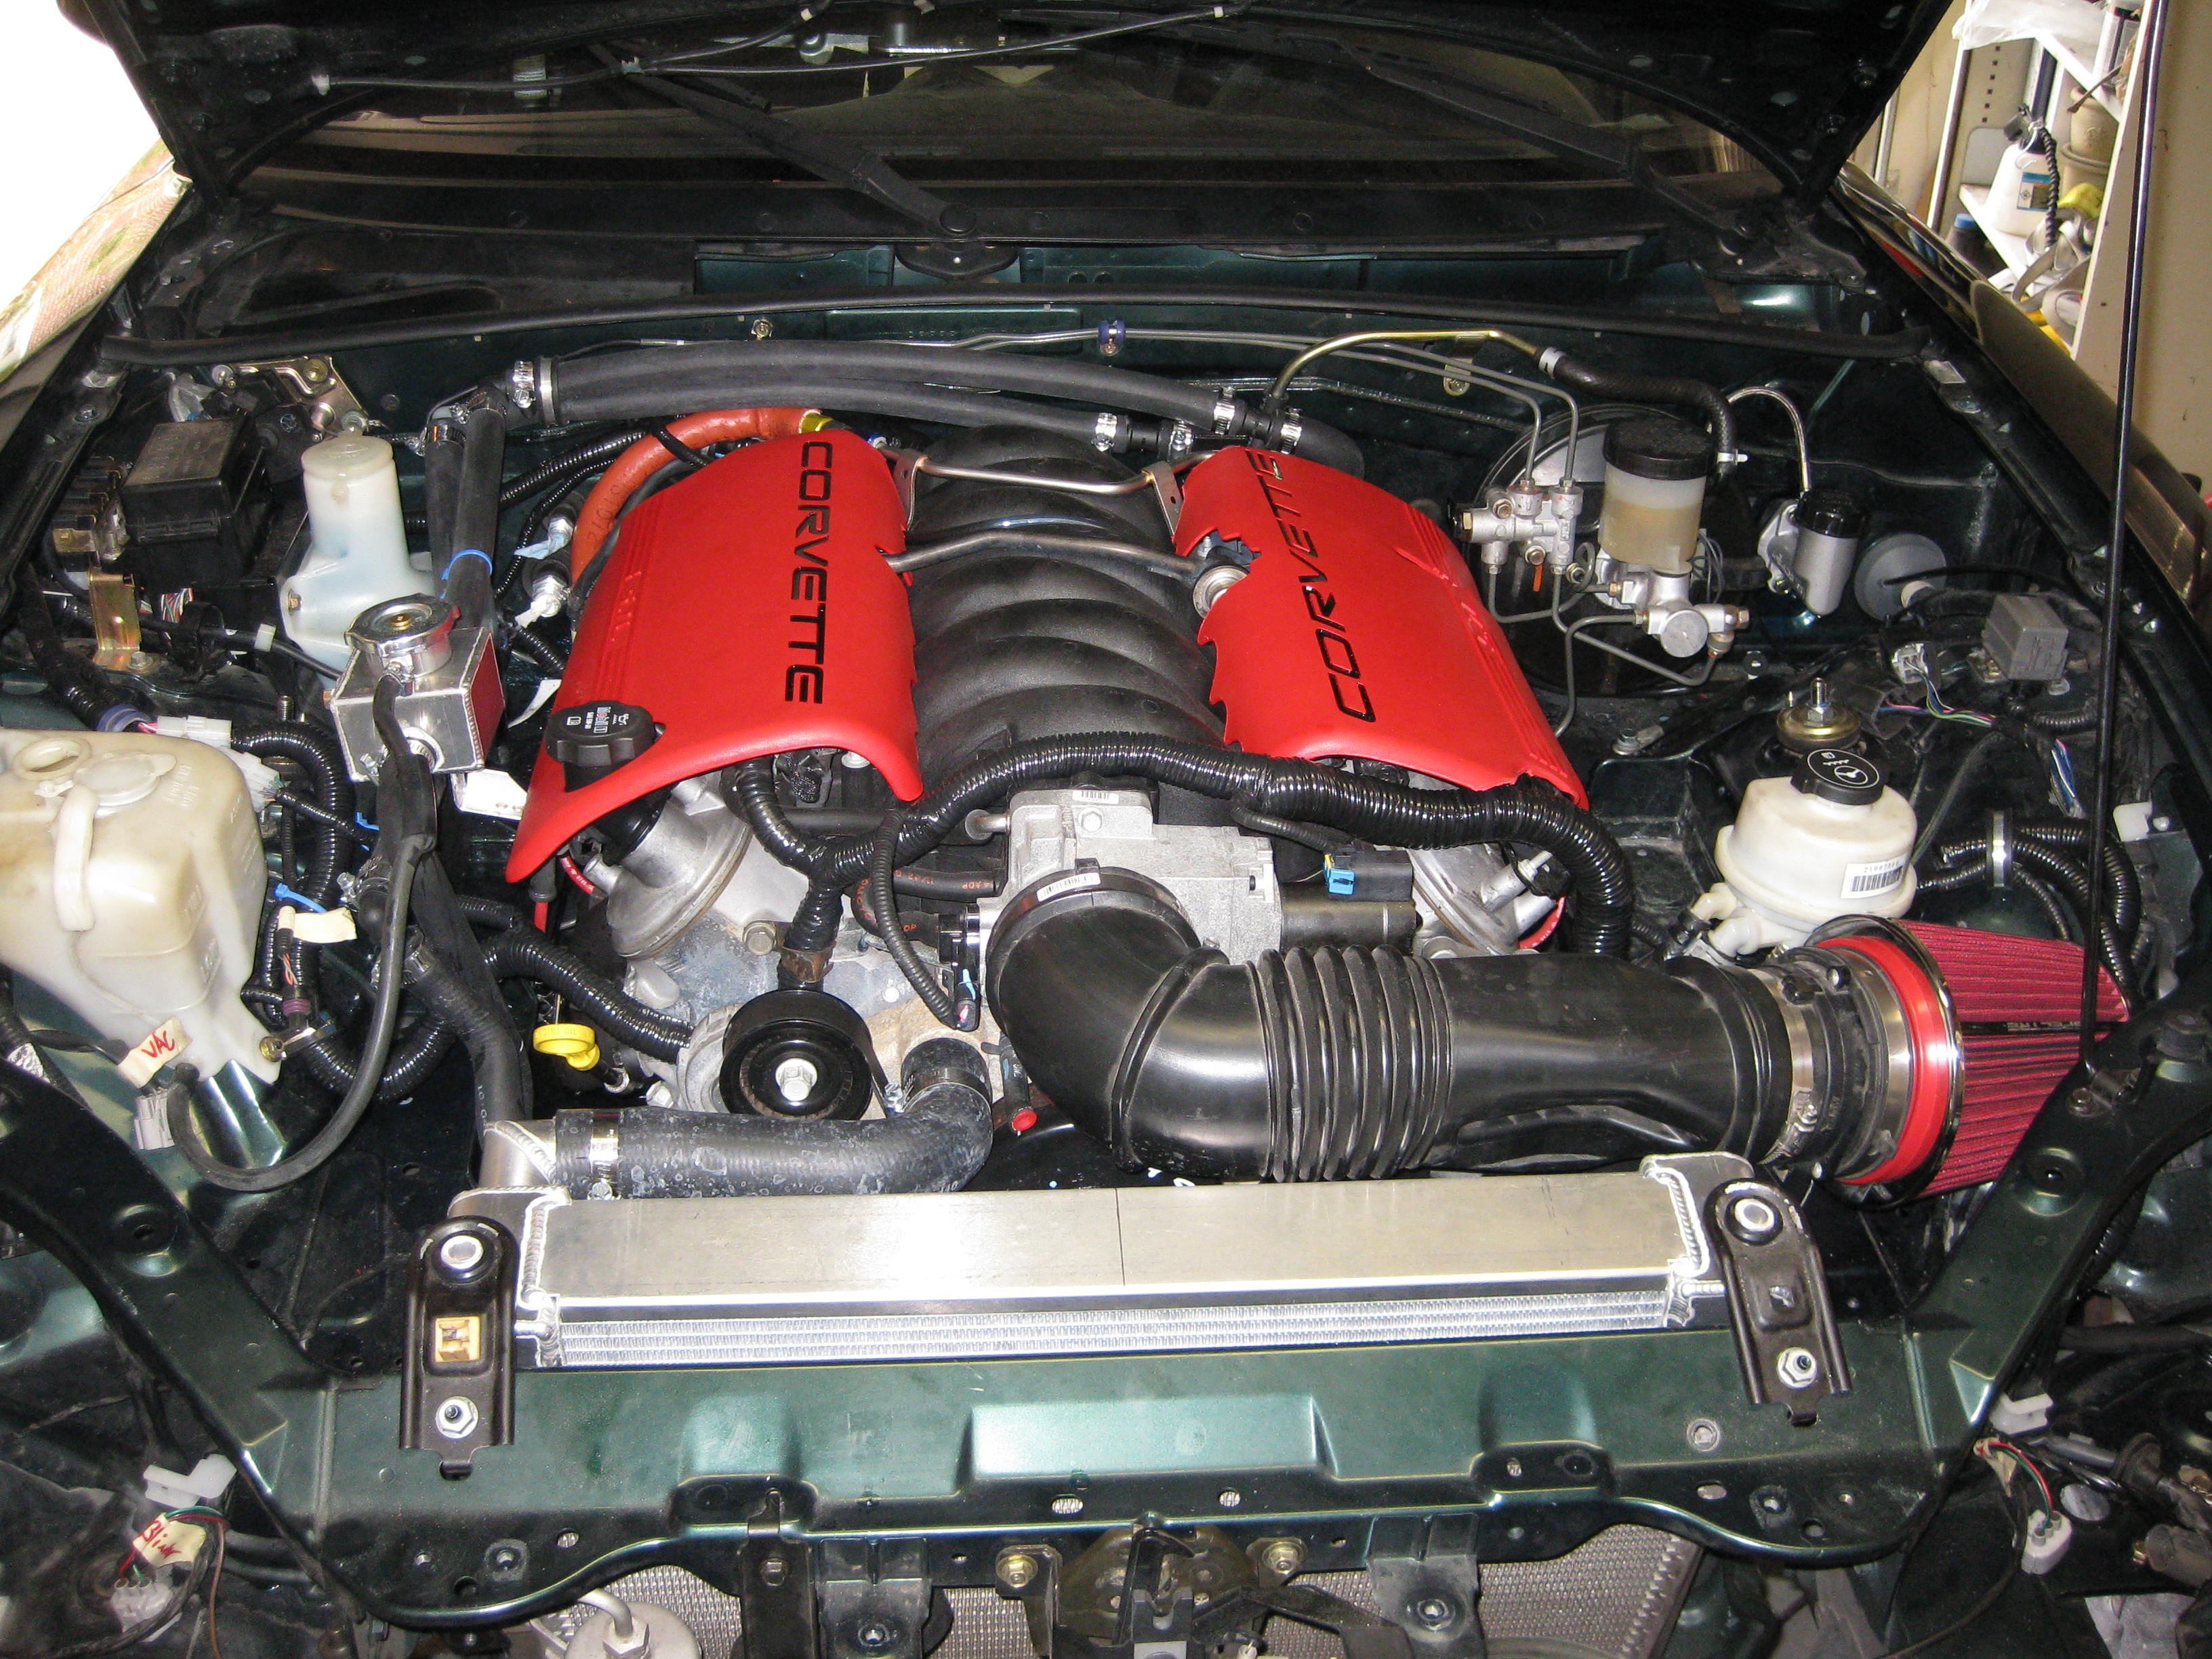
The Engine of choice for this operation was the LS6 engine found commonly in Corvettes, GTO's, Cadi CTS-V's, and a few others.
I started with a purchase of a CTS-V engine and 6spd manual transmission from a salvage yard off Ebay. Price? $5500.00. Little did I know that the t-56 transmission in the cadi was going to be useless. I read where Nathan said this would be challengine. What he should have said was no way possible under any circumstances. See transmission section.
Here is how it arrived off my truck. Wesley went to get it in Alabama from Certified Auto Recycling in Ardmore Alabama. The e-bay add said it was running, they had run it, and it was a good engine. Surprise to me it had a gash in the oil pan and damage to the wire harness. Since I had to replace the oil pan I was not much worried about that, but the wire harness and other missing parts like the pedal and throttle control module were terrible. Went through trials and tribulations with them.
![]()
![]()
![]()
![]()
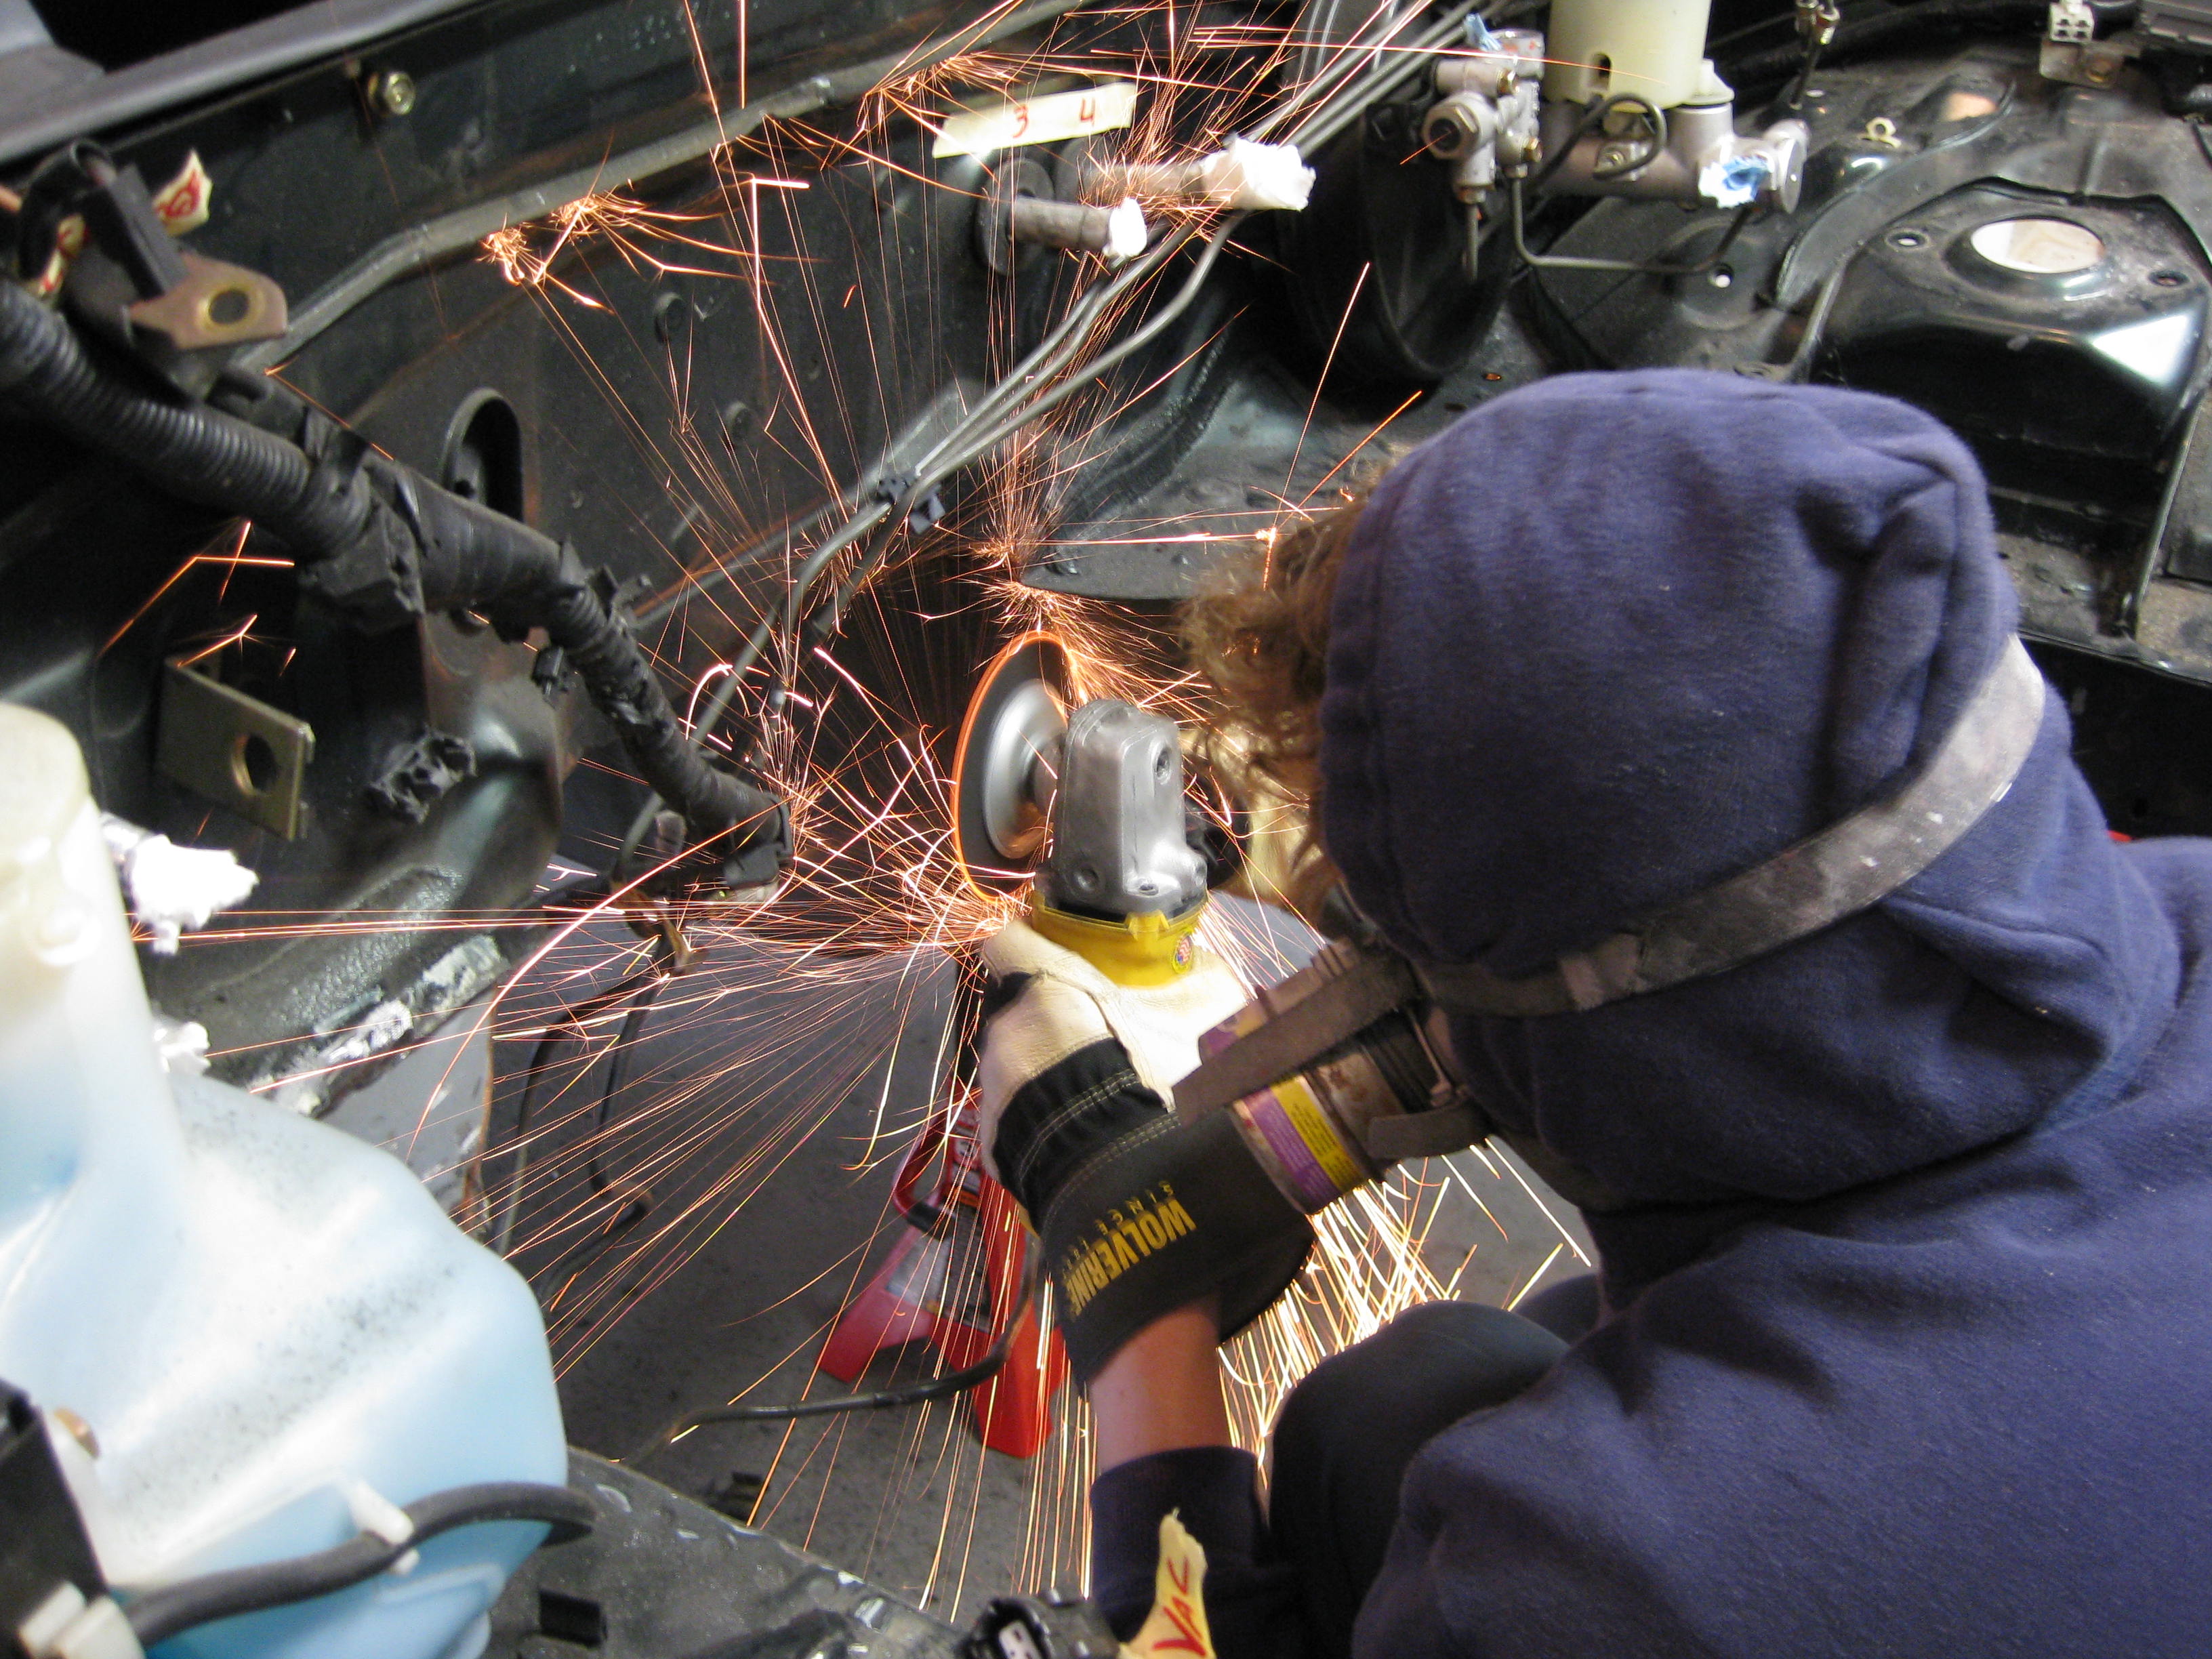
Before getting the engine in, must make room for it. The only cutting on the project is the gussets on both sides have to be removed. Sparks are flying. As my buddy Scott Solberg Delta Airline mechanic always used to say to me, "cut to fit, paint to match."
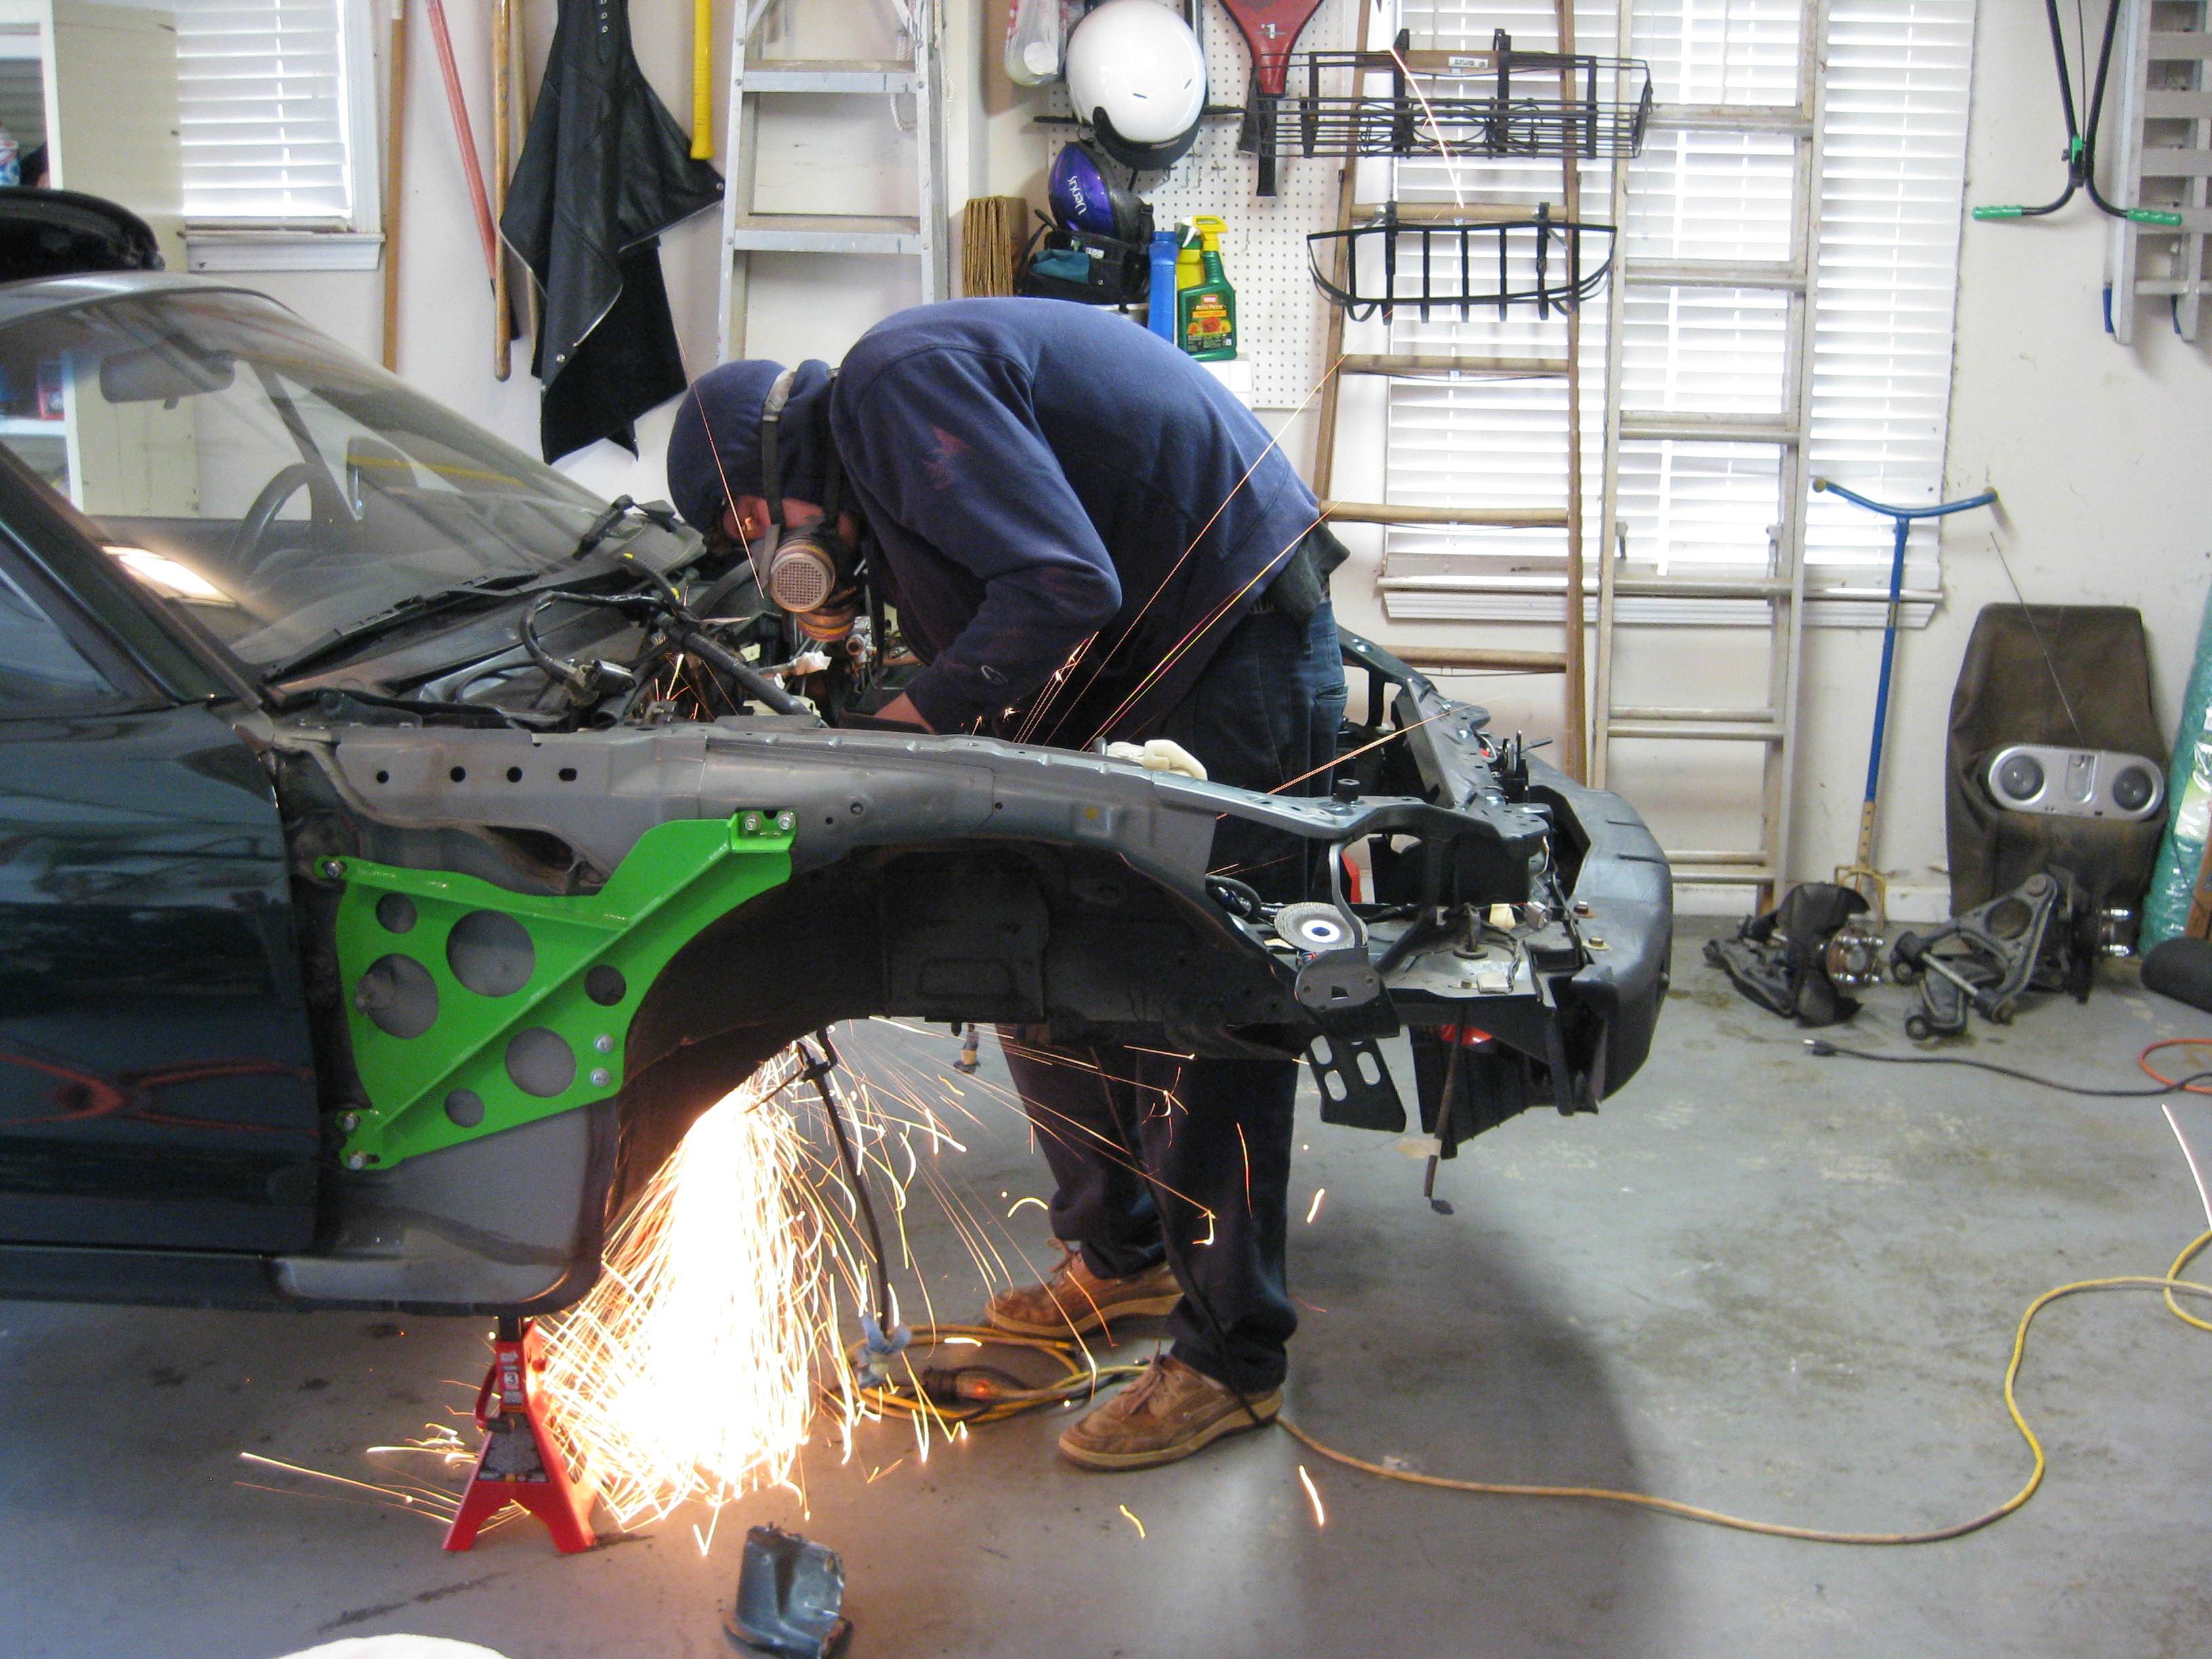
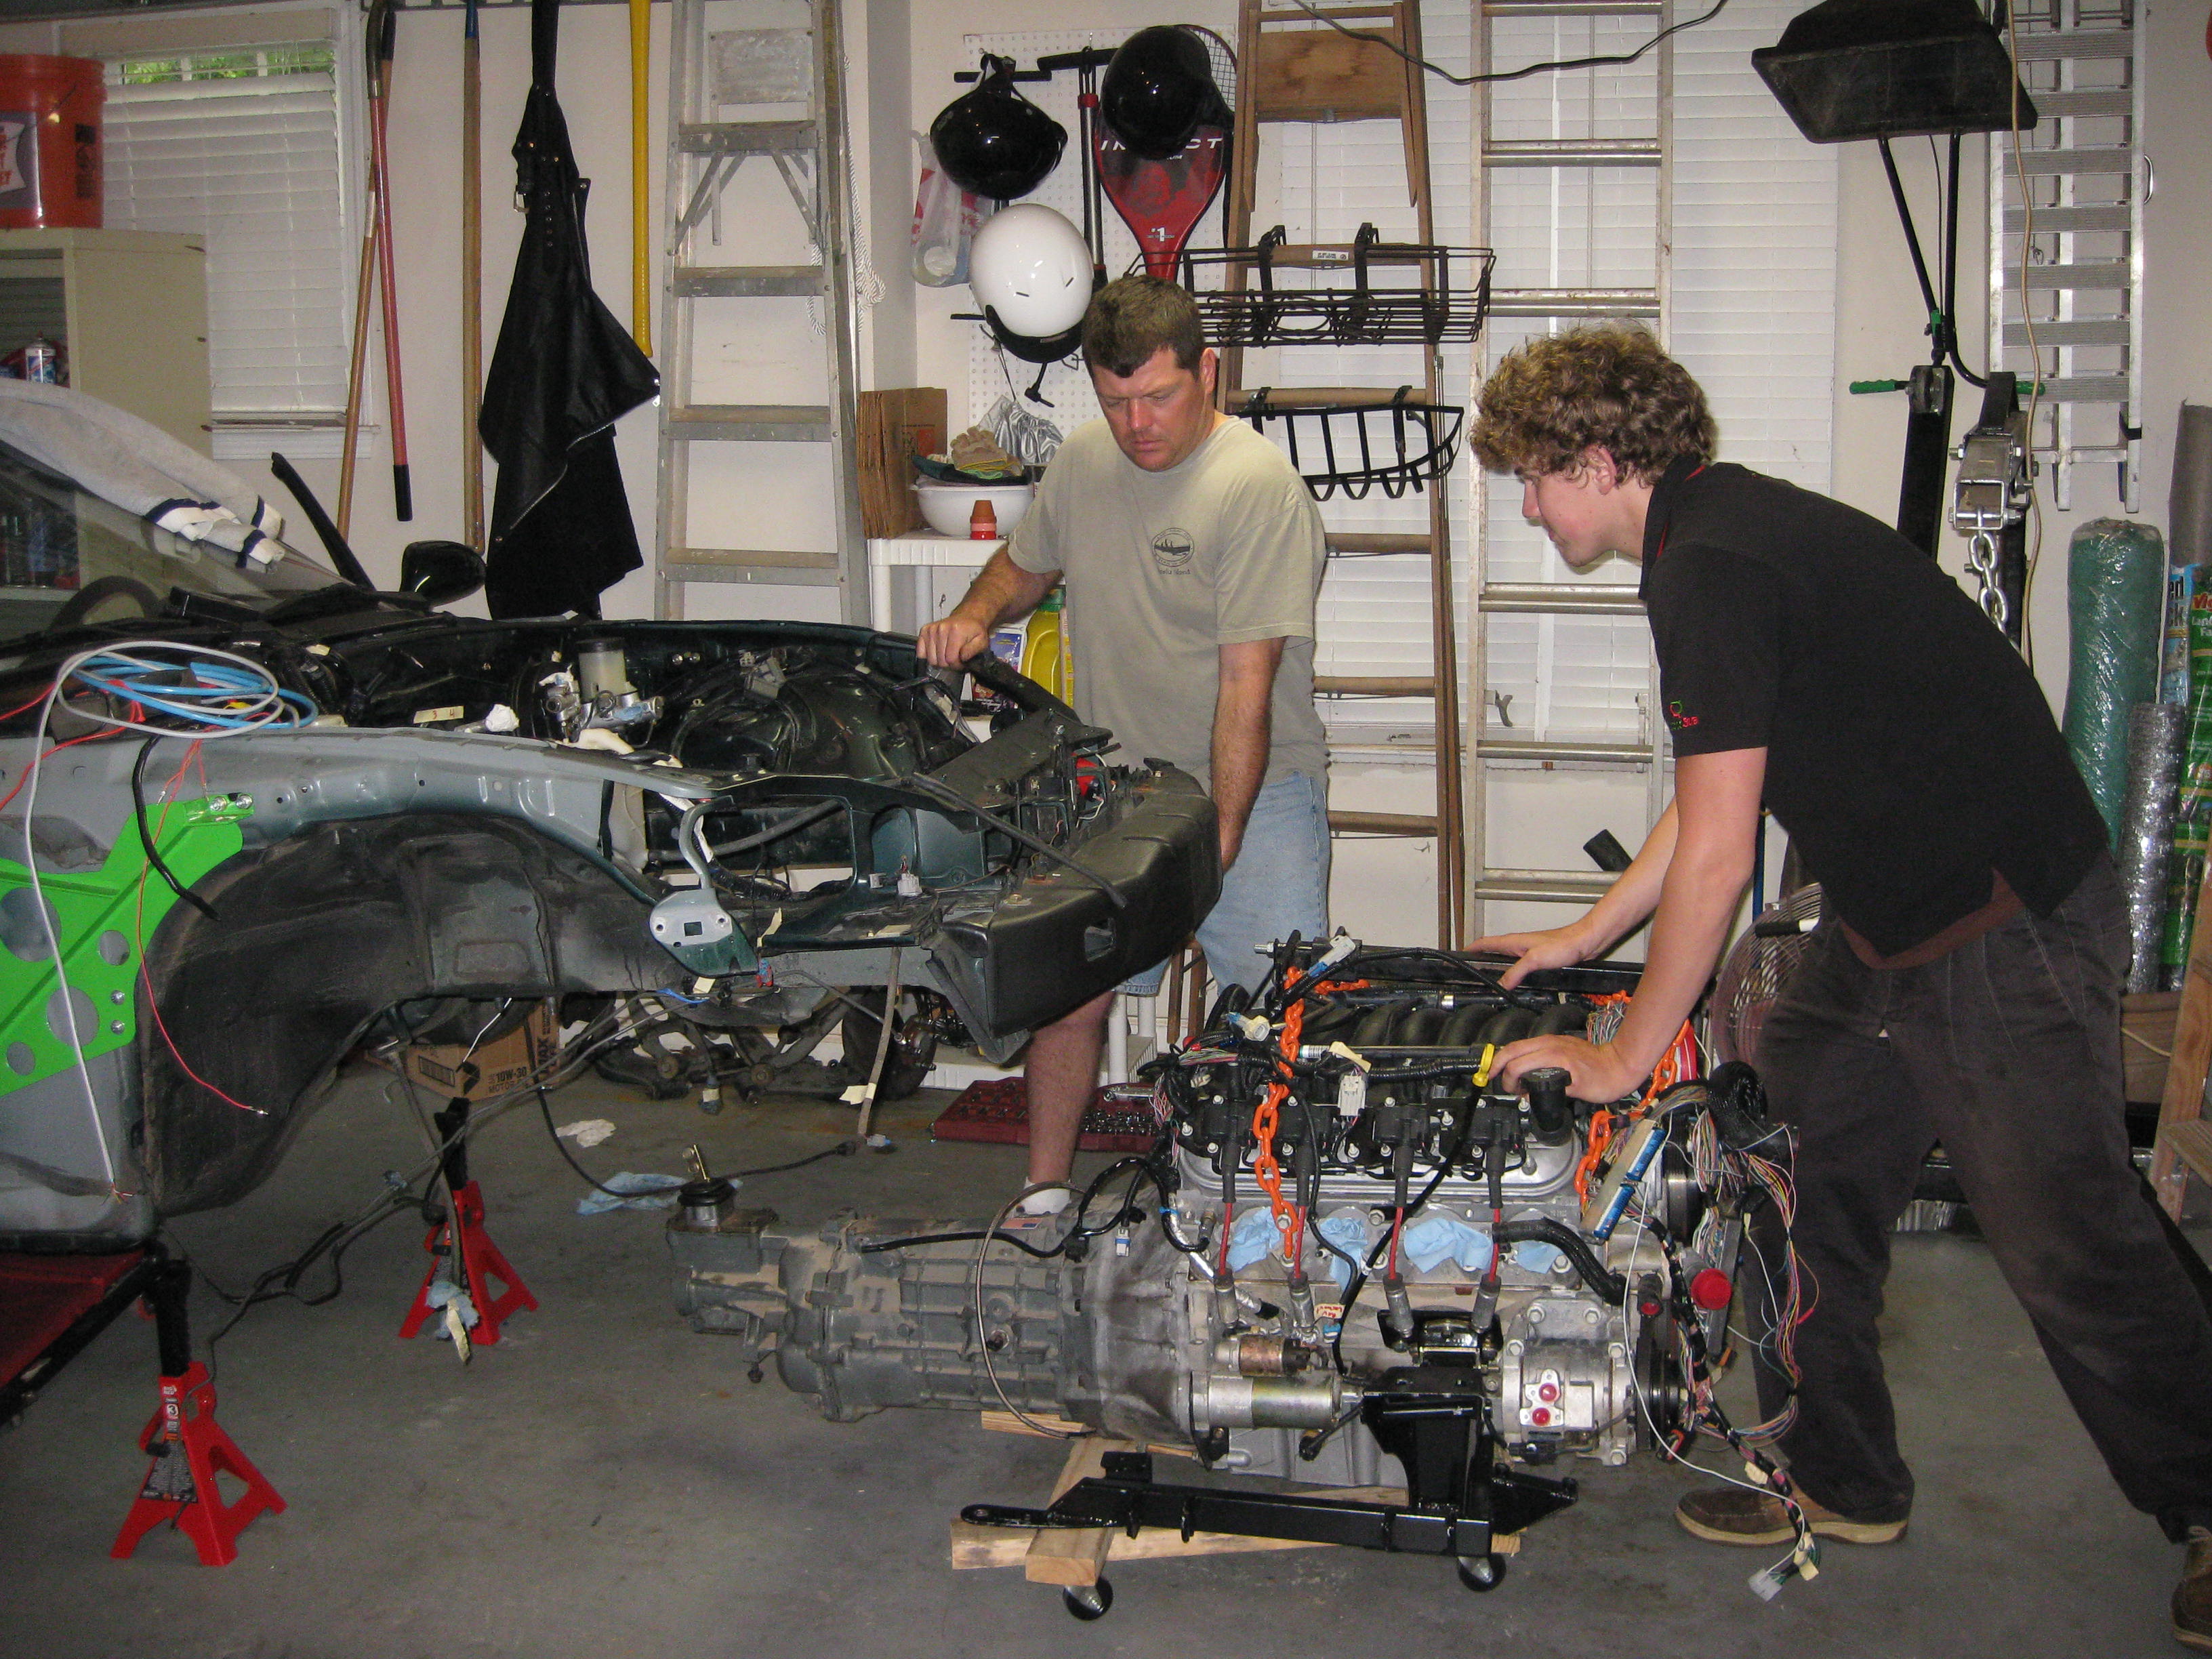
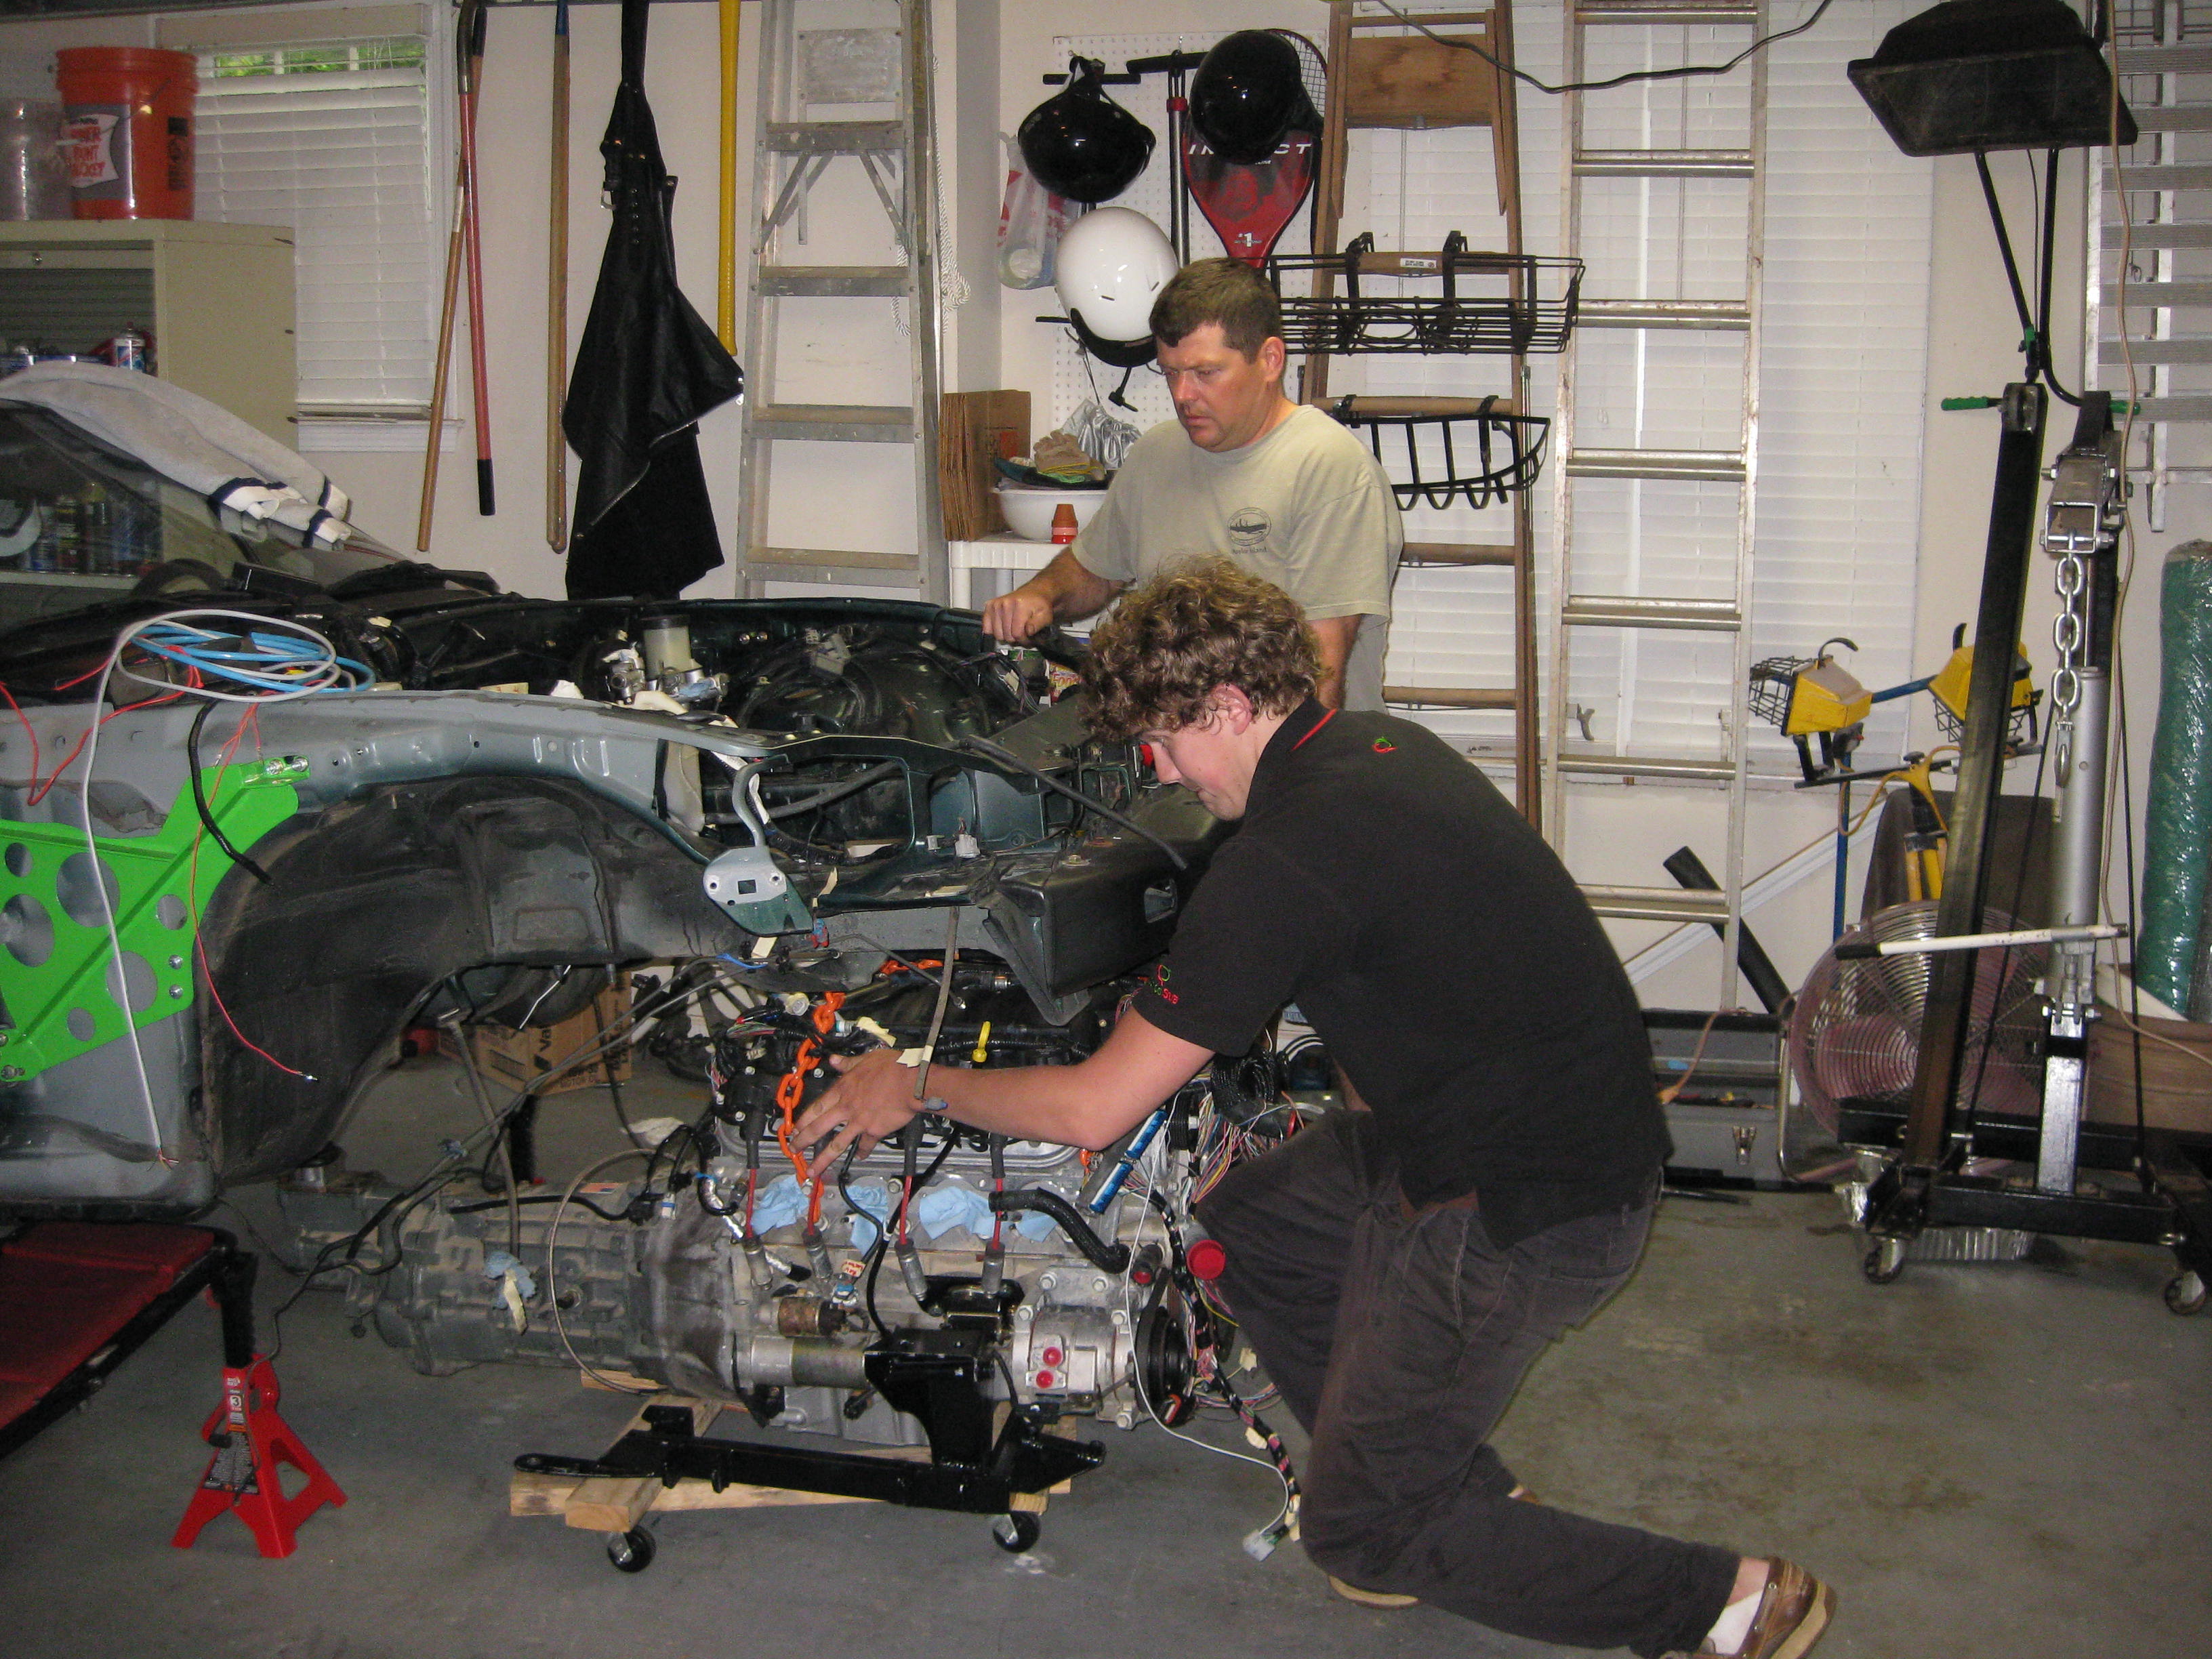
One of the first things Wesley did turned out to be one of the best. He made a dolly to roll the engine around on. It was perfect, cheap, and reliable. Video on how it works here.

Key to this operation it that be properly supported, you can just roll the engine under while someone lifts. Its easy, and makes quick work of getting the engine in and out. I lift, he pushes the engine under. Way to go Wesley!
Disaster strikes!!!
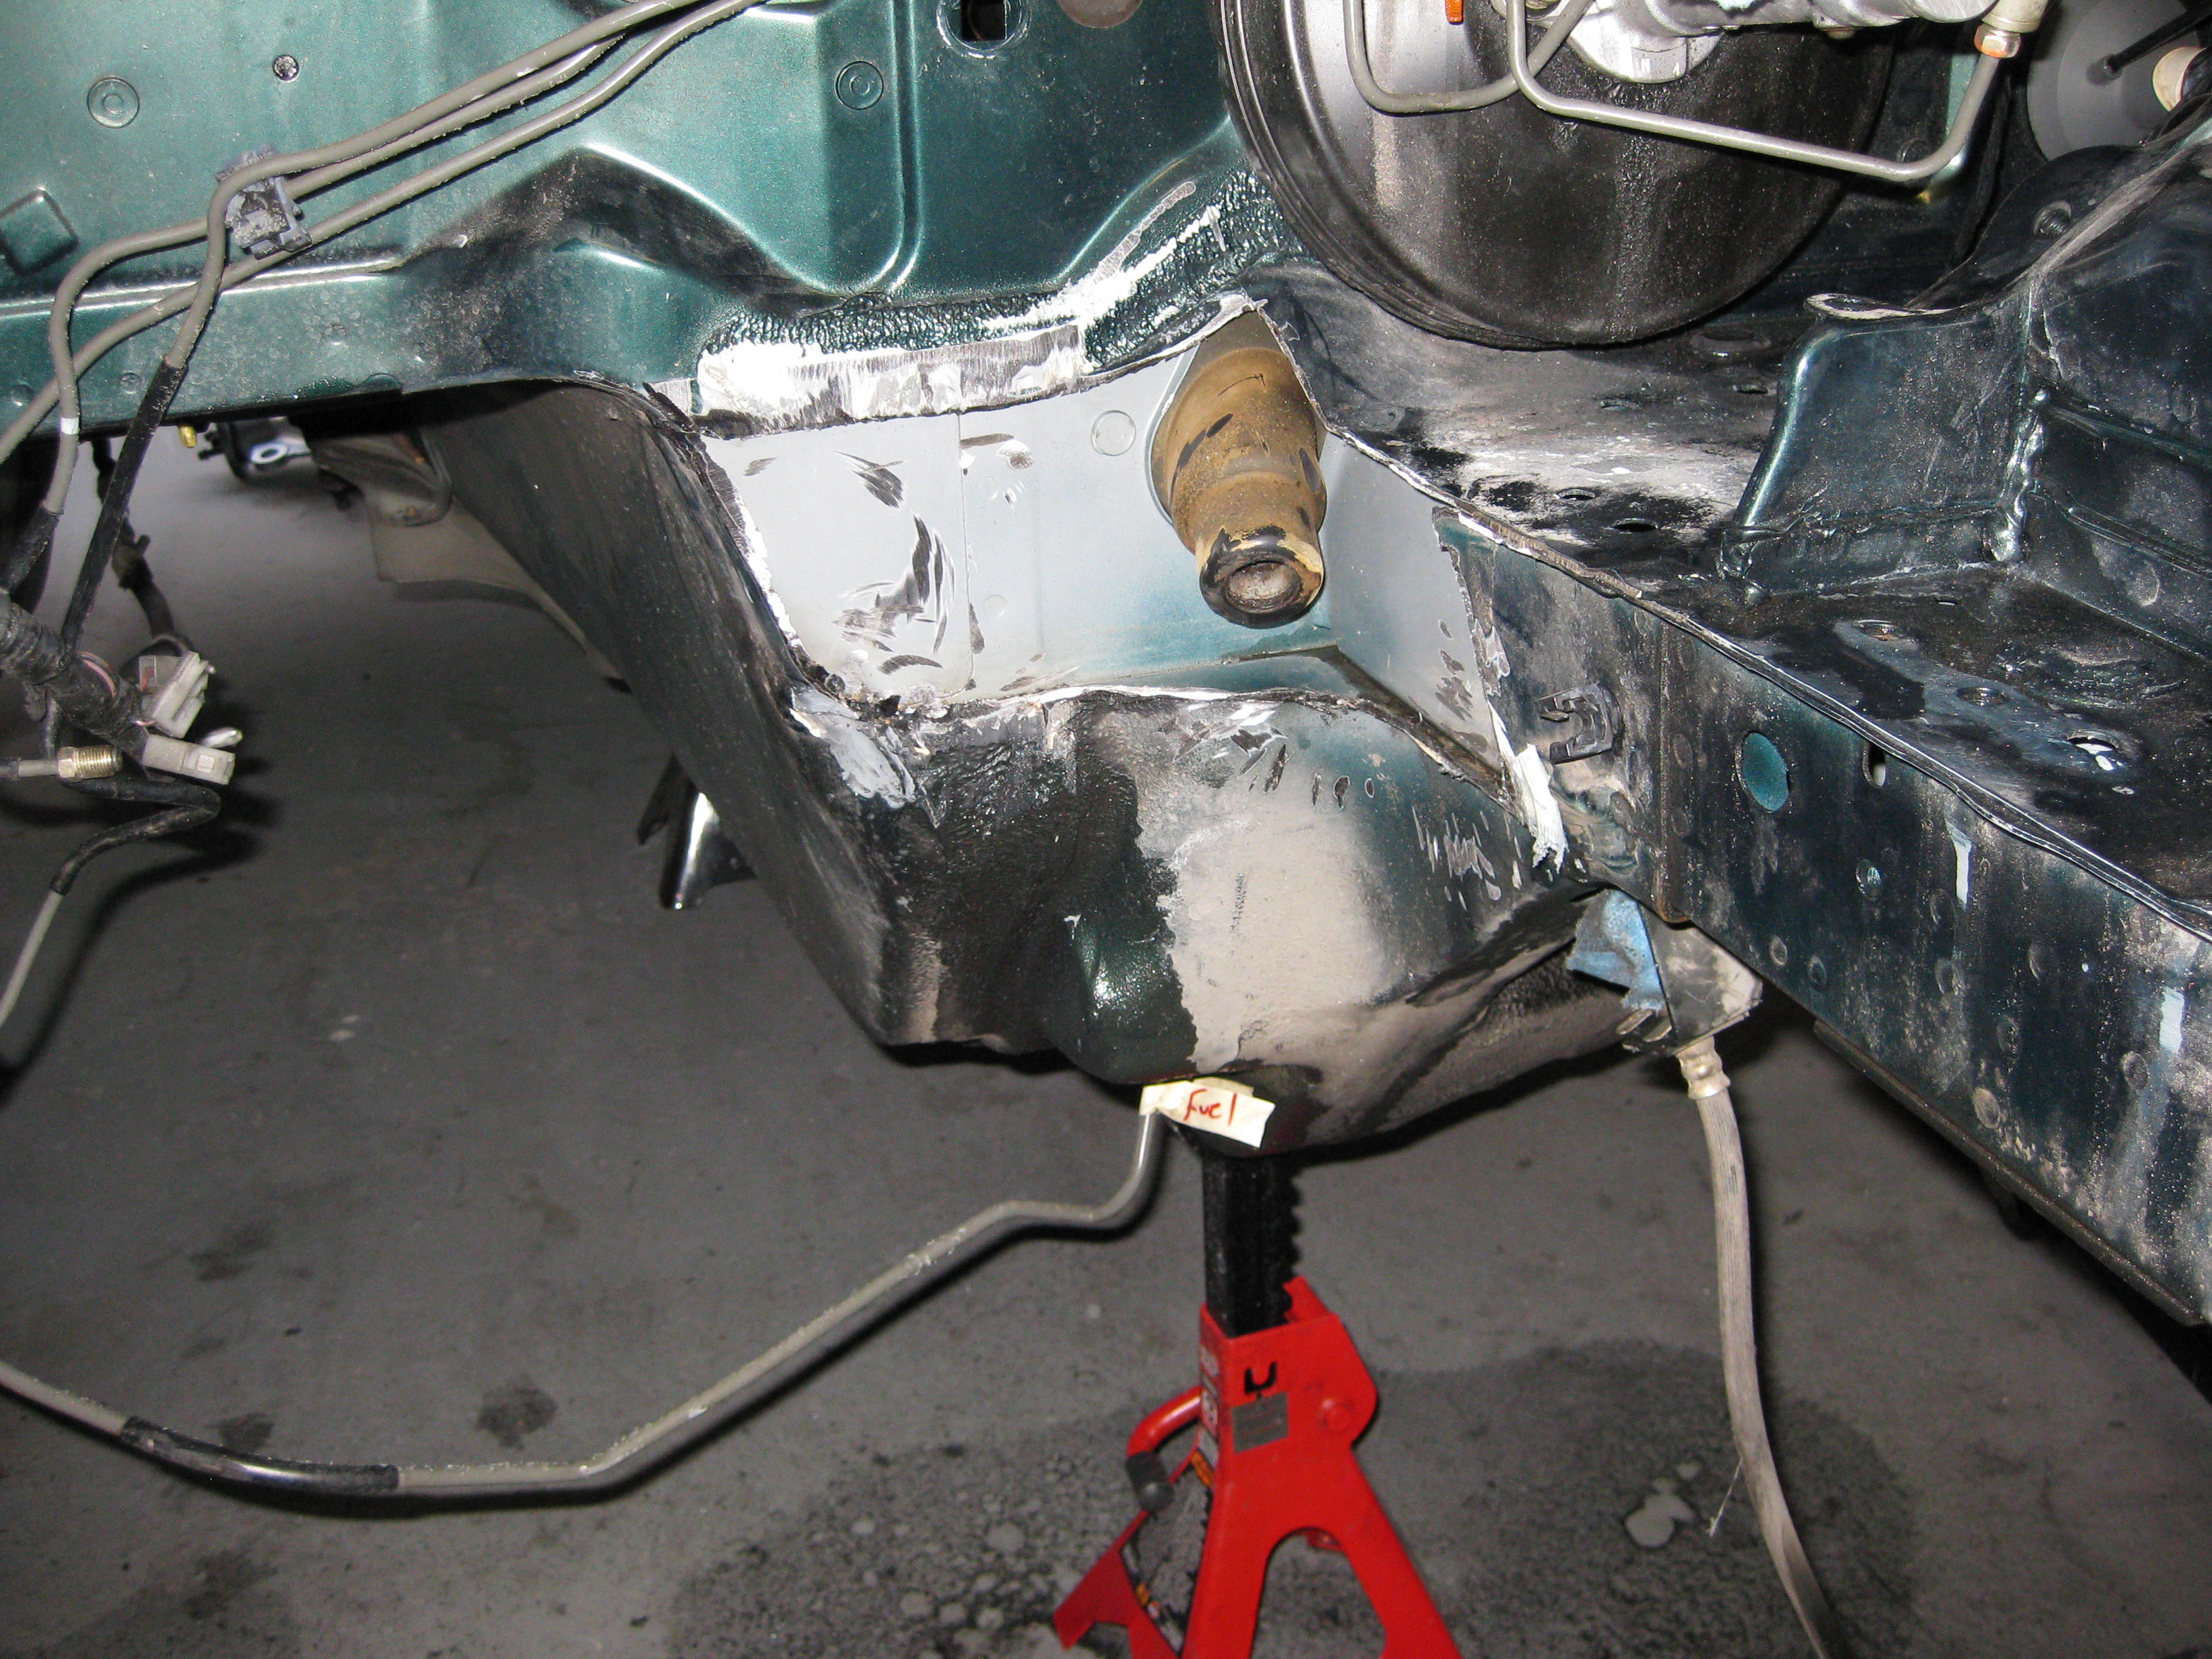
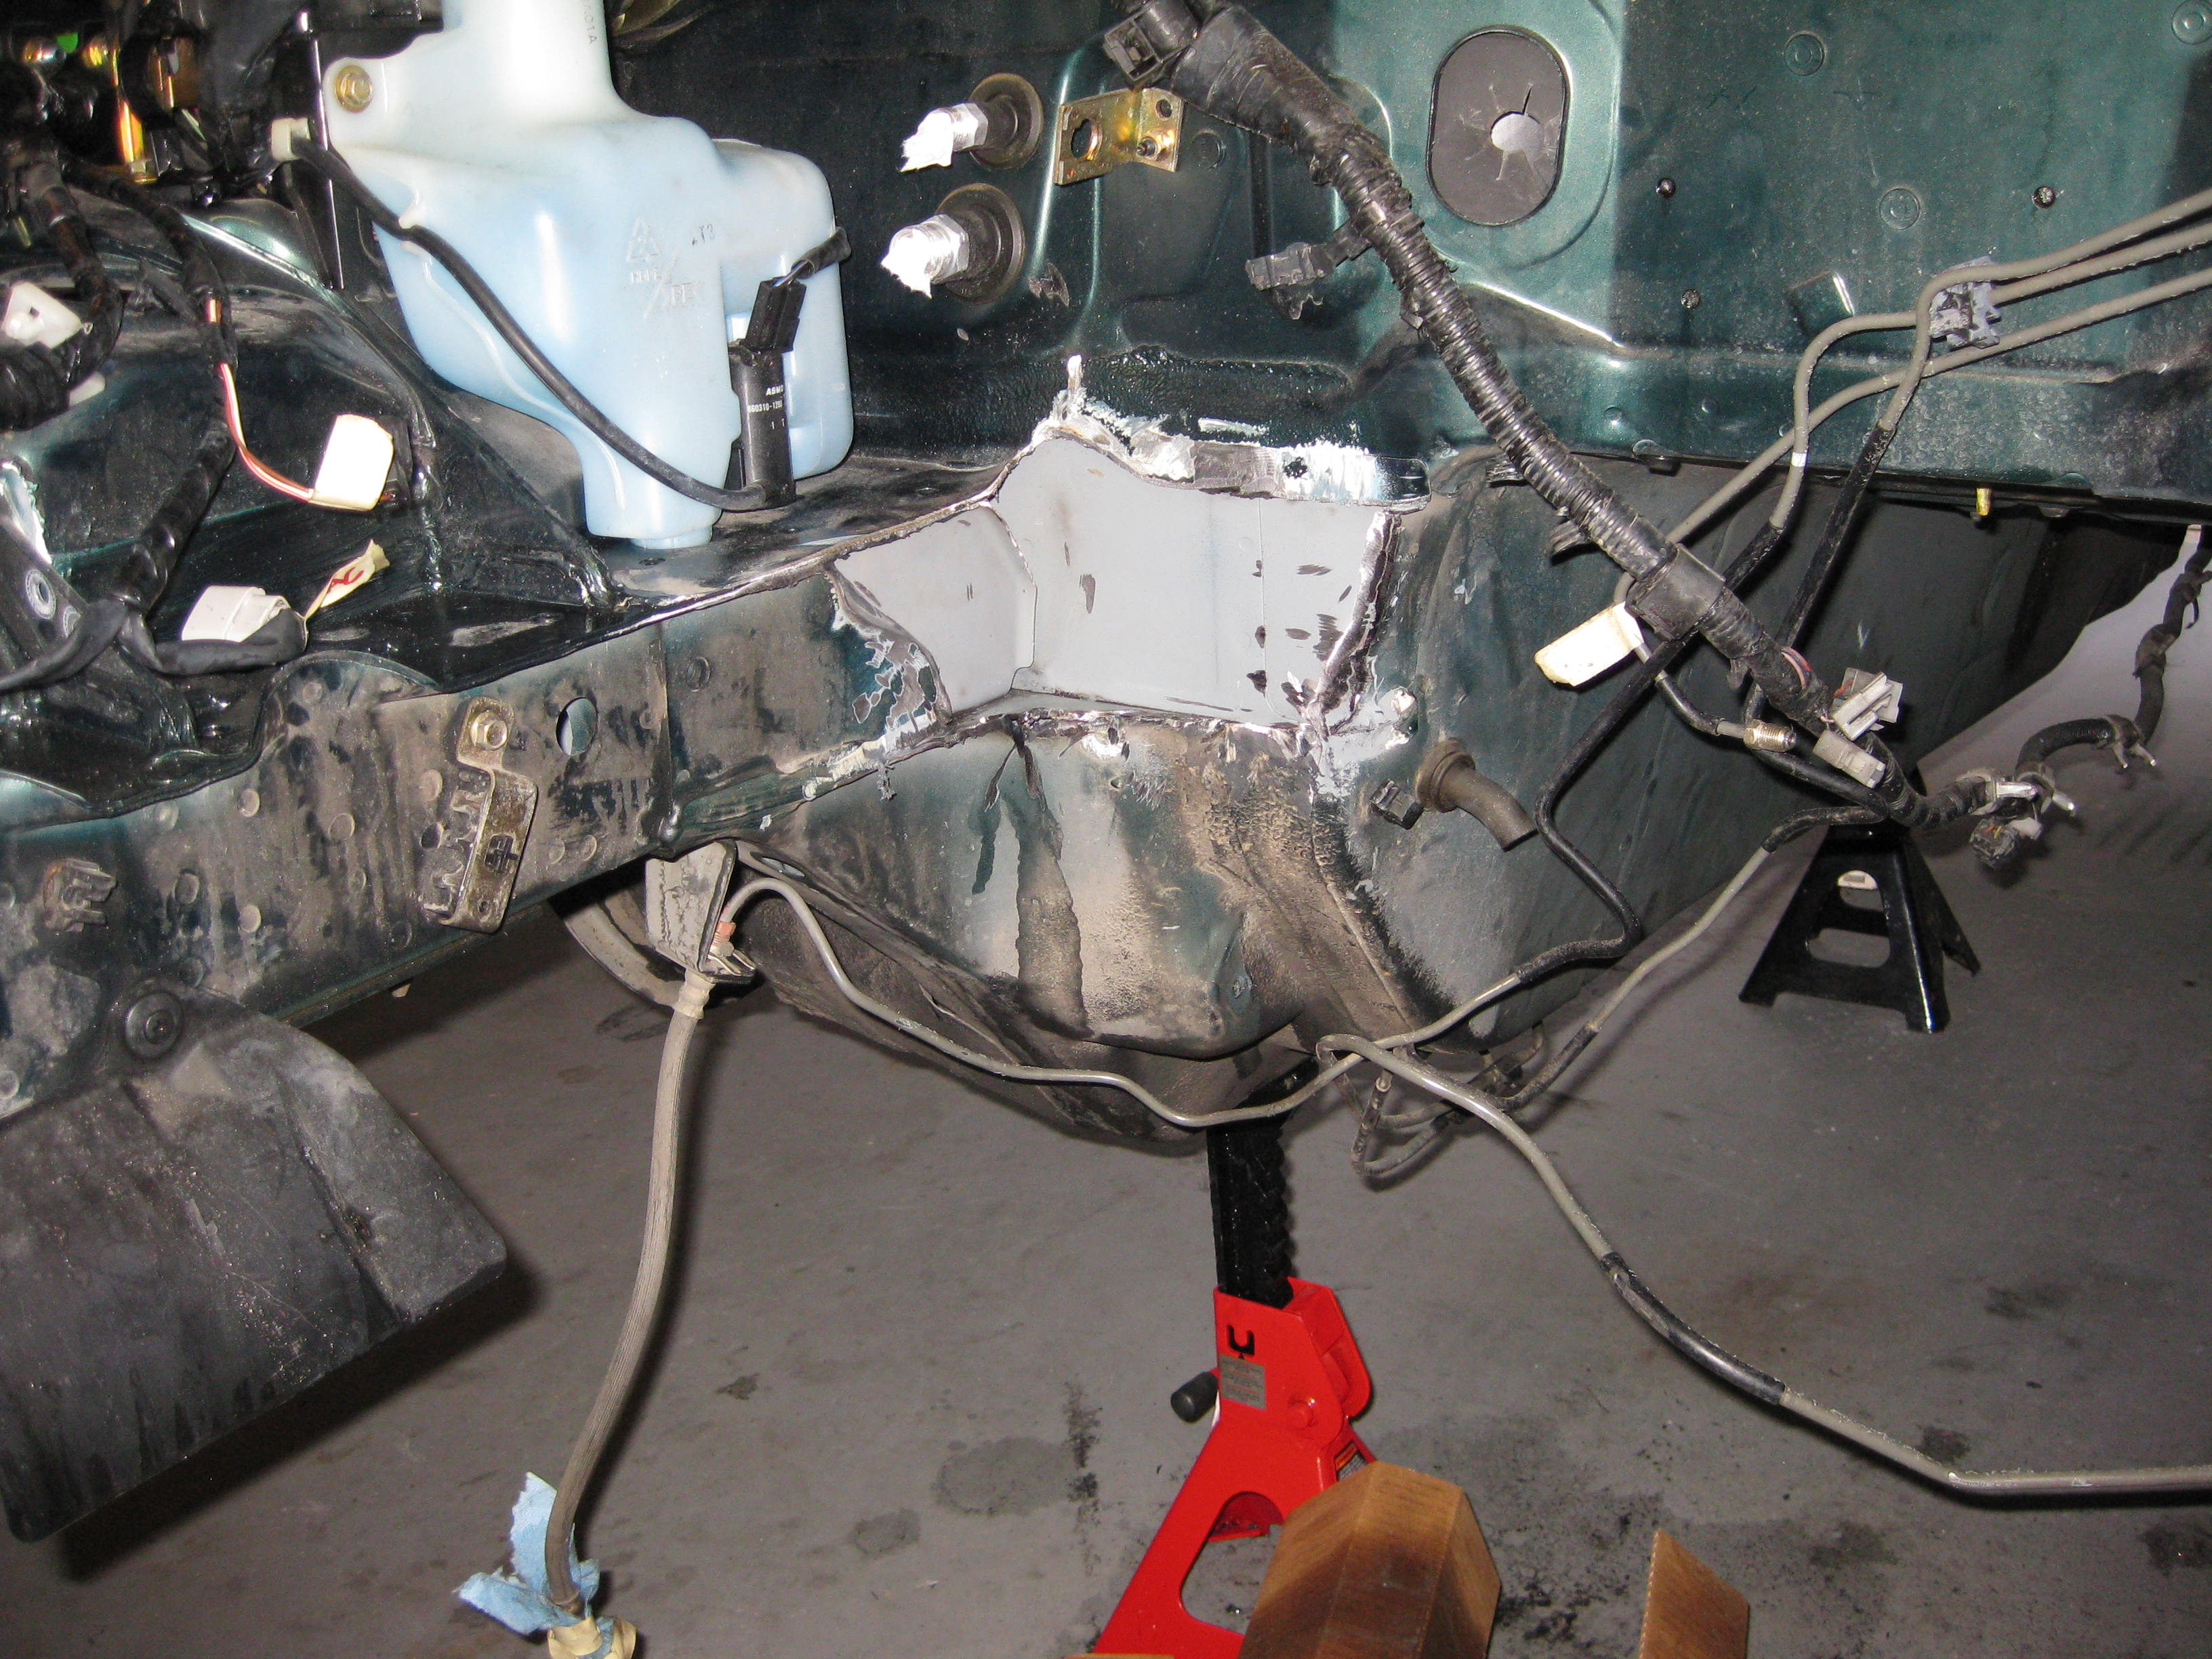
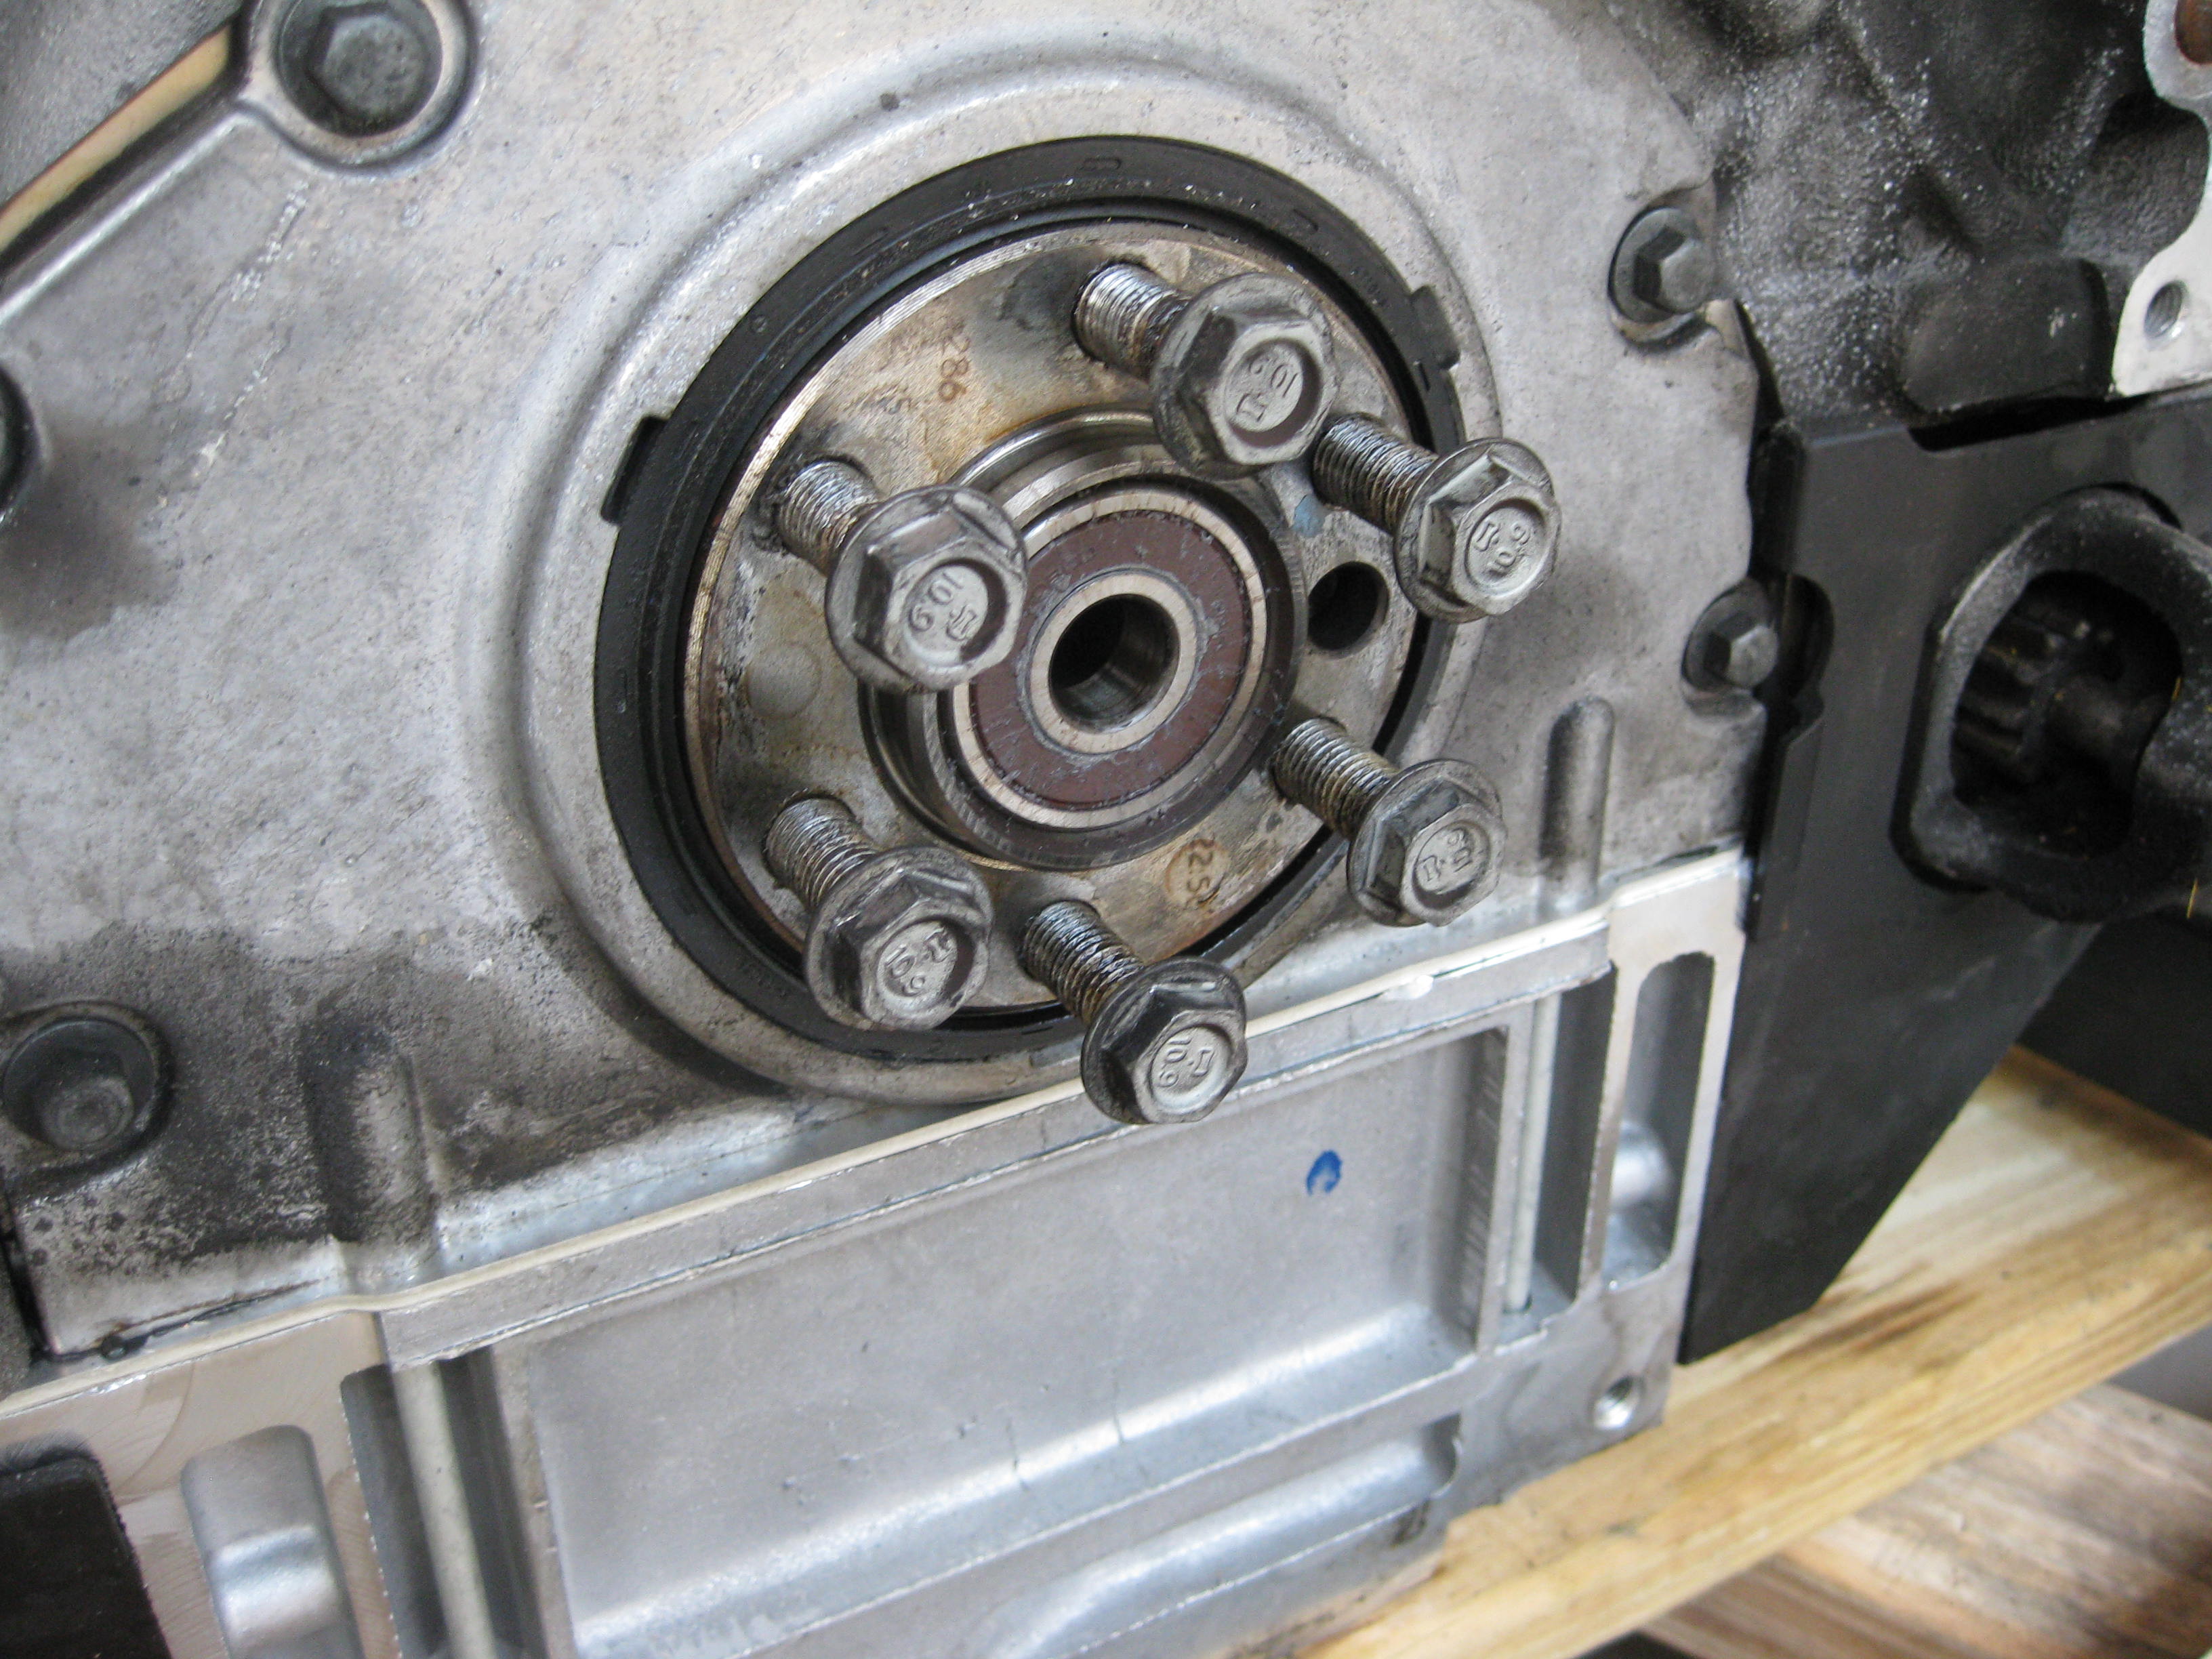
While mating the transmission to the engine with the WRONG PILOT BEARING, I managed to crack the block. We were using bolts to pull the trans onto the engine case and got a hairline crack in the block. AHHH! Left lower rear, oil journal just above the oil pressure switch in installed. Dammit. Again we did not listen or read Nathans report and got the shaft for it. Left pic before being stupid. Middle is result, right is the fix (we hope).


This bearing out of the LS6 had to be removed and replaced with the correct one to mate with my 2000 Firebird T-56 transmission. A rented pilot bearing puller from your local supplier will do the trick. The left pic is the original bearing. The one on the right is the old one removed and the new much smaller one installed deeper in the crank. The output shaft of the Firebird T-56 is longer than the CTS-V one. This was the cause of my cracked block. ARGH!

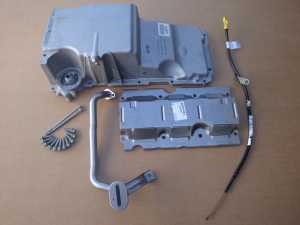
This install requires a customized oil pan. I managed to find one From LS1 Wizard for $378 including shipping. This is a low profile pan for clearing the engine cradle. Had issues with the oil filter adapter. Turns out the new pans use a PF48 oil filter rather than the LS1 style filter. This would have been good to know. I spent many trips to Advance tring to figure this out.
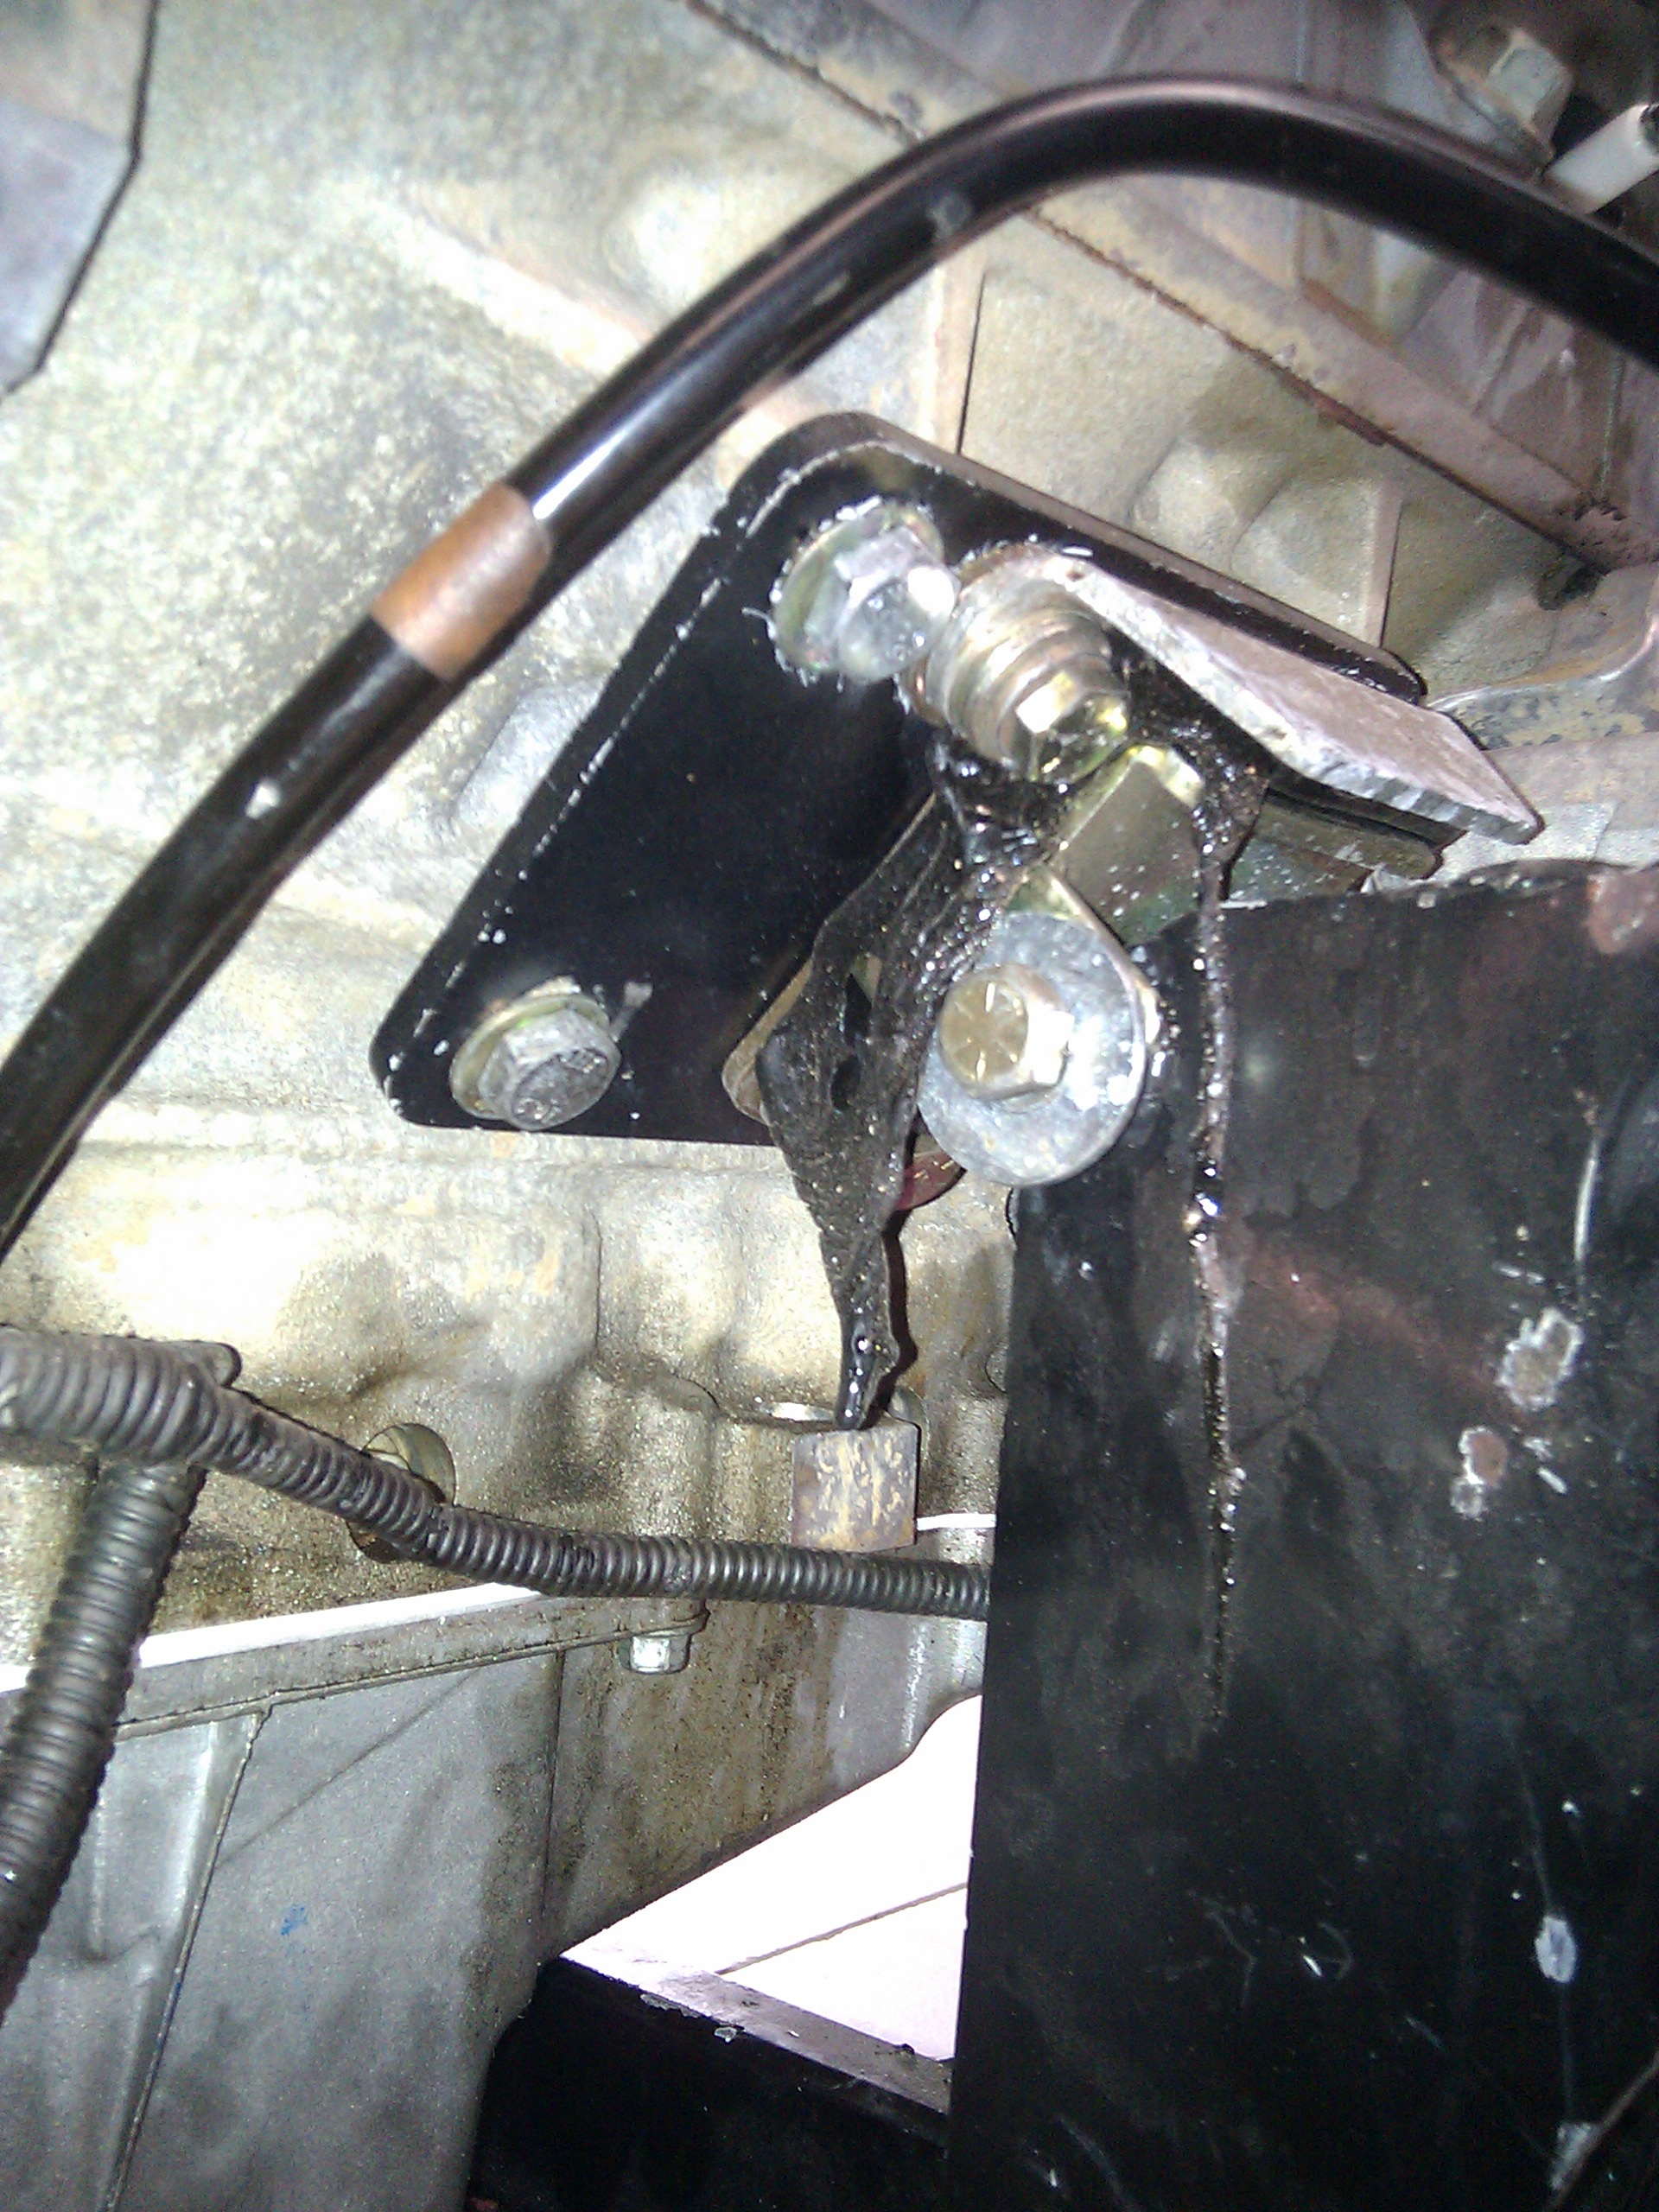
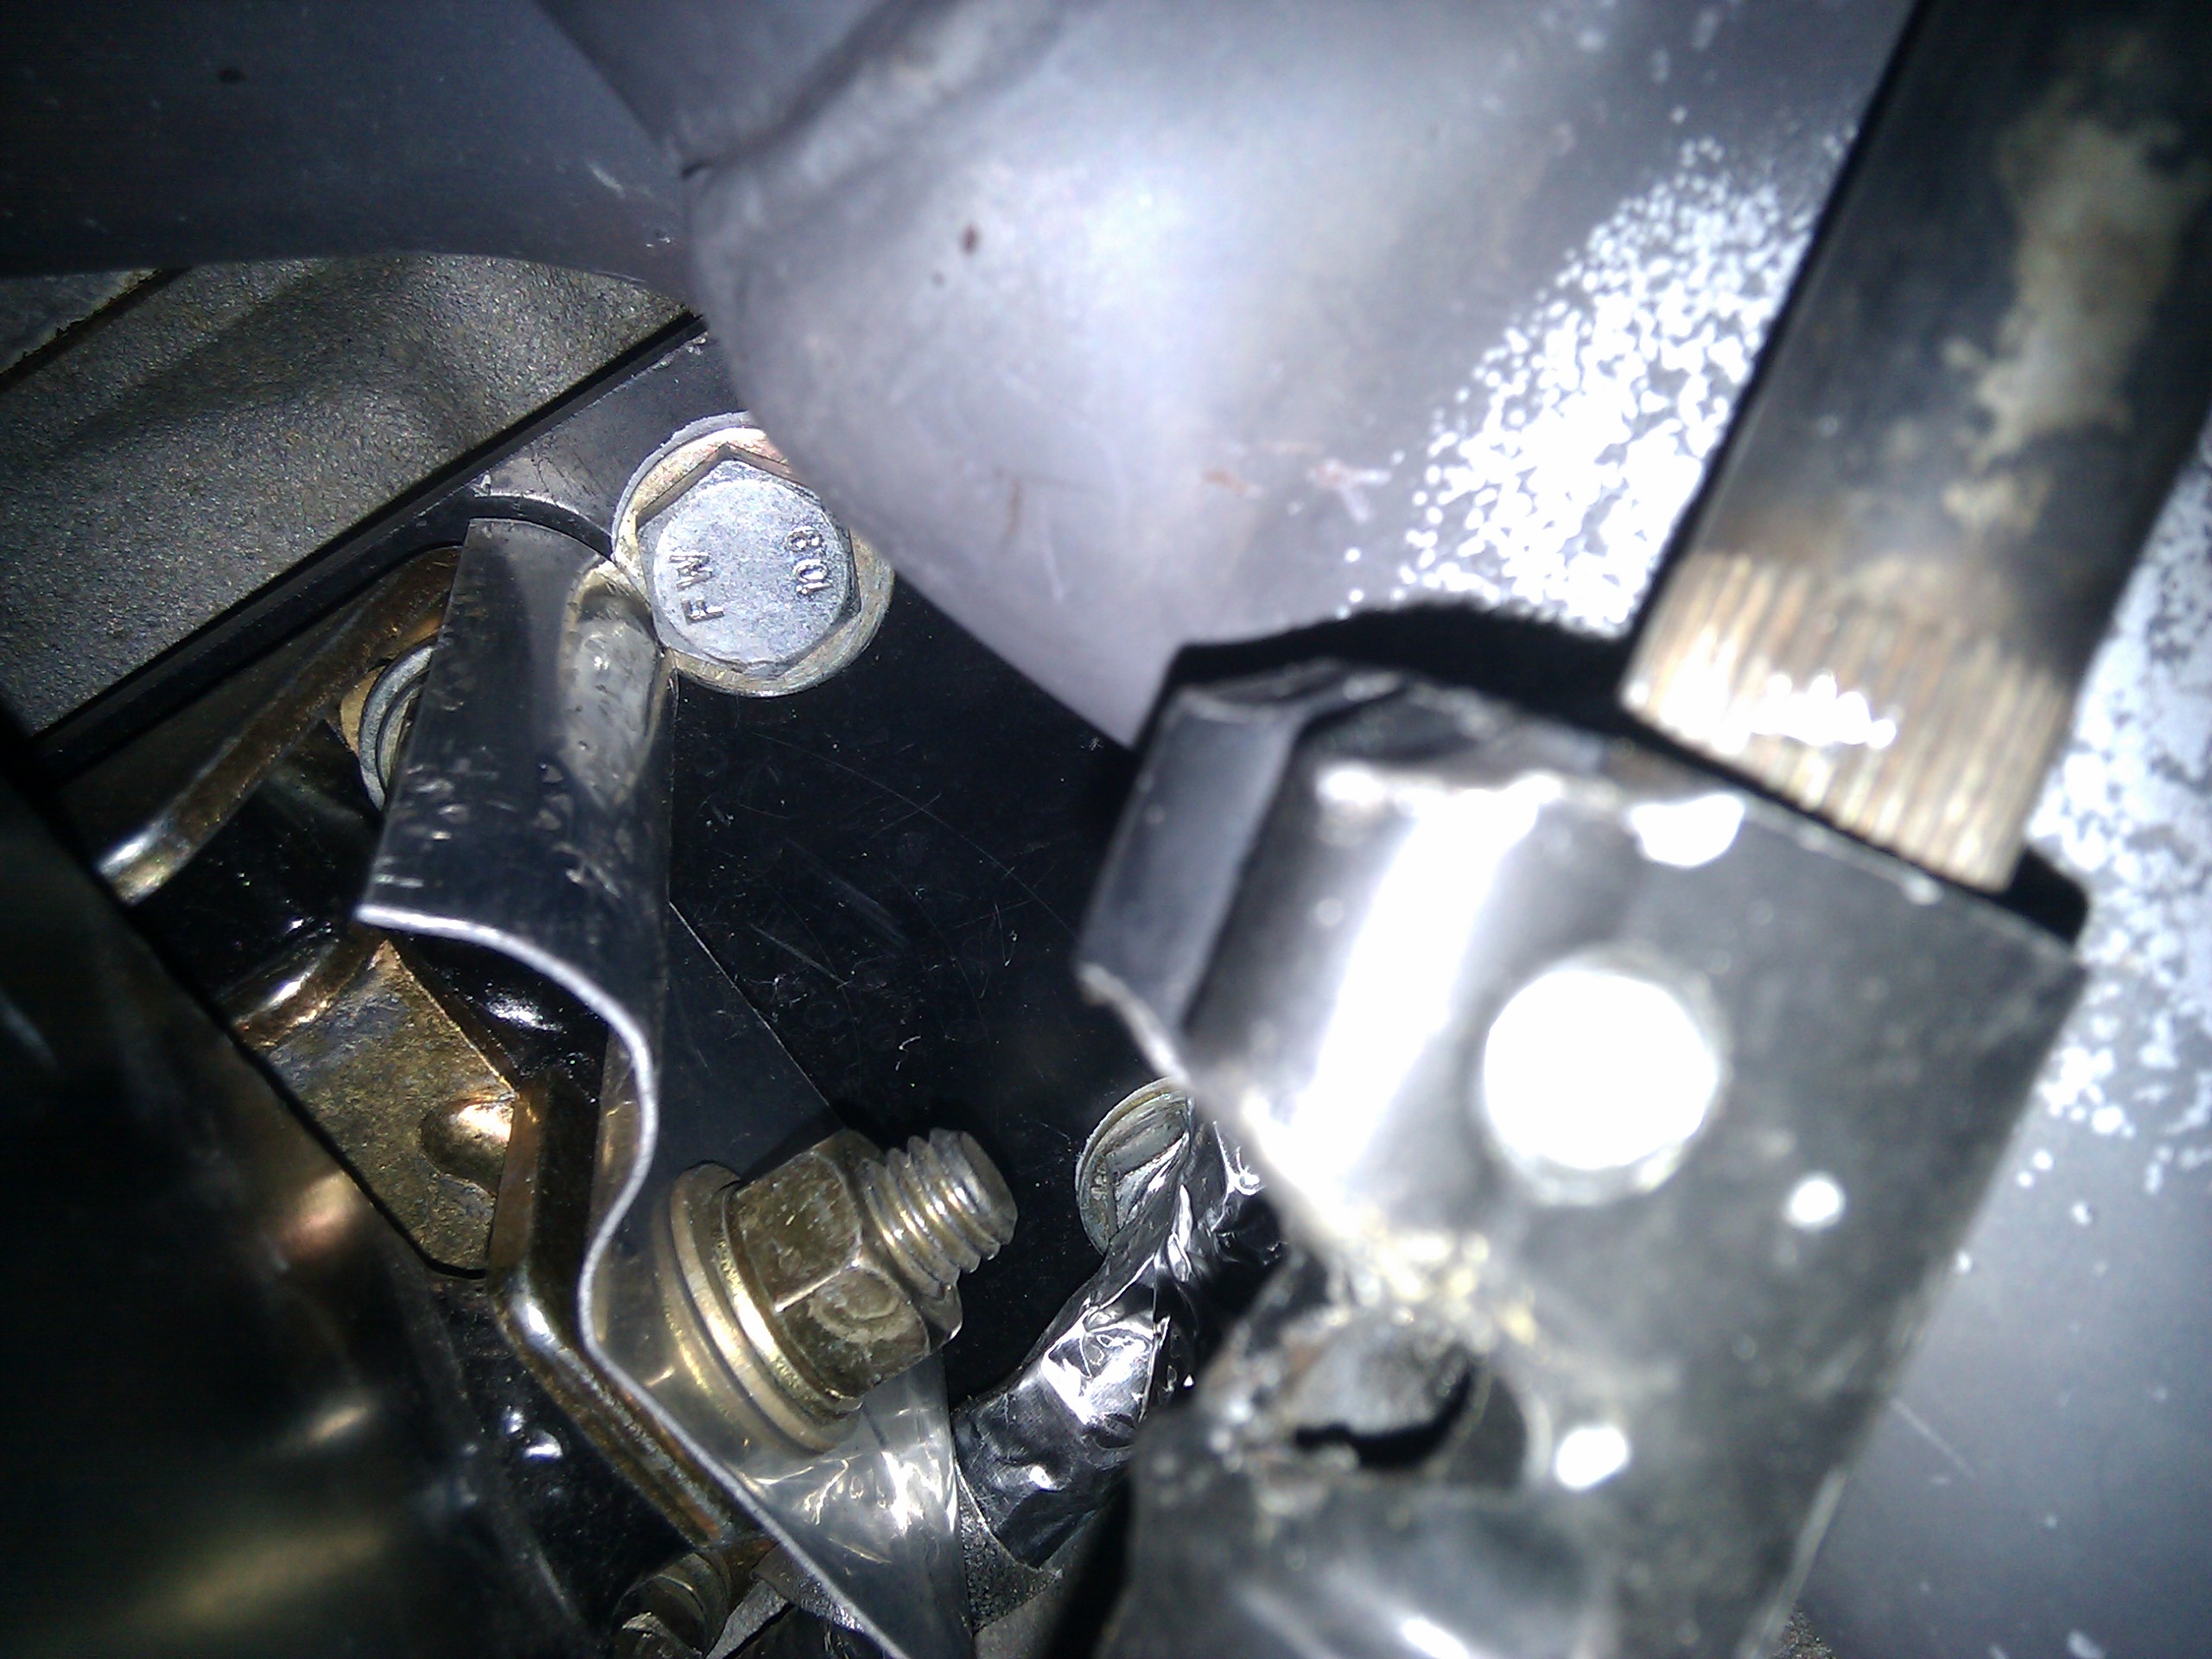
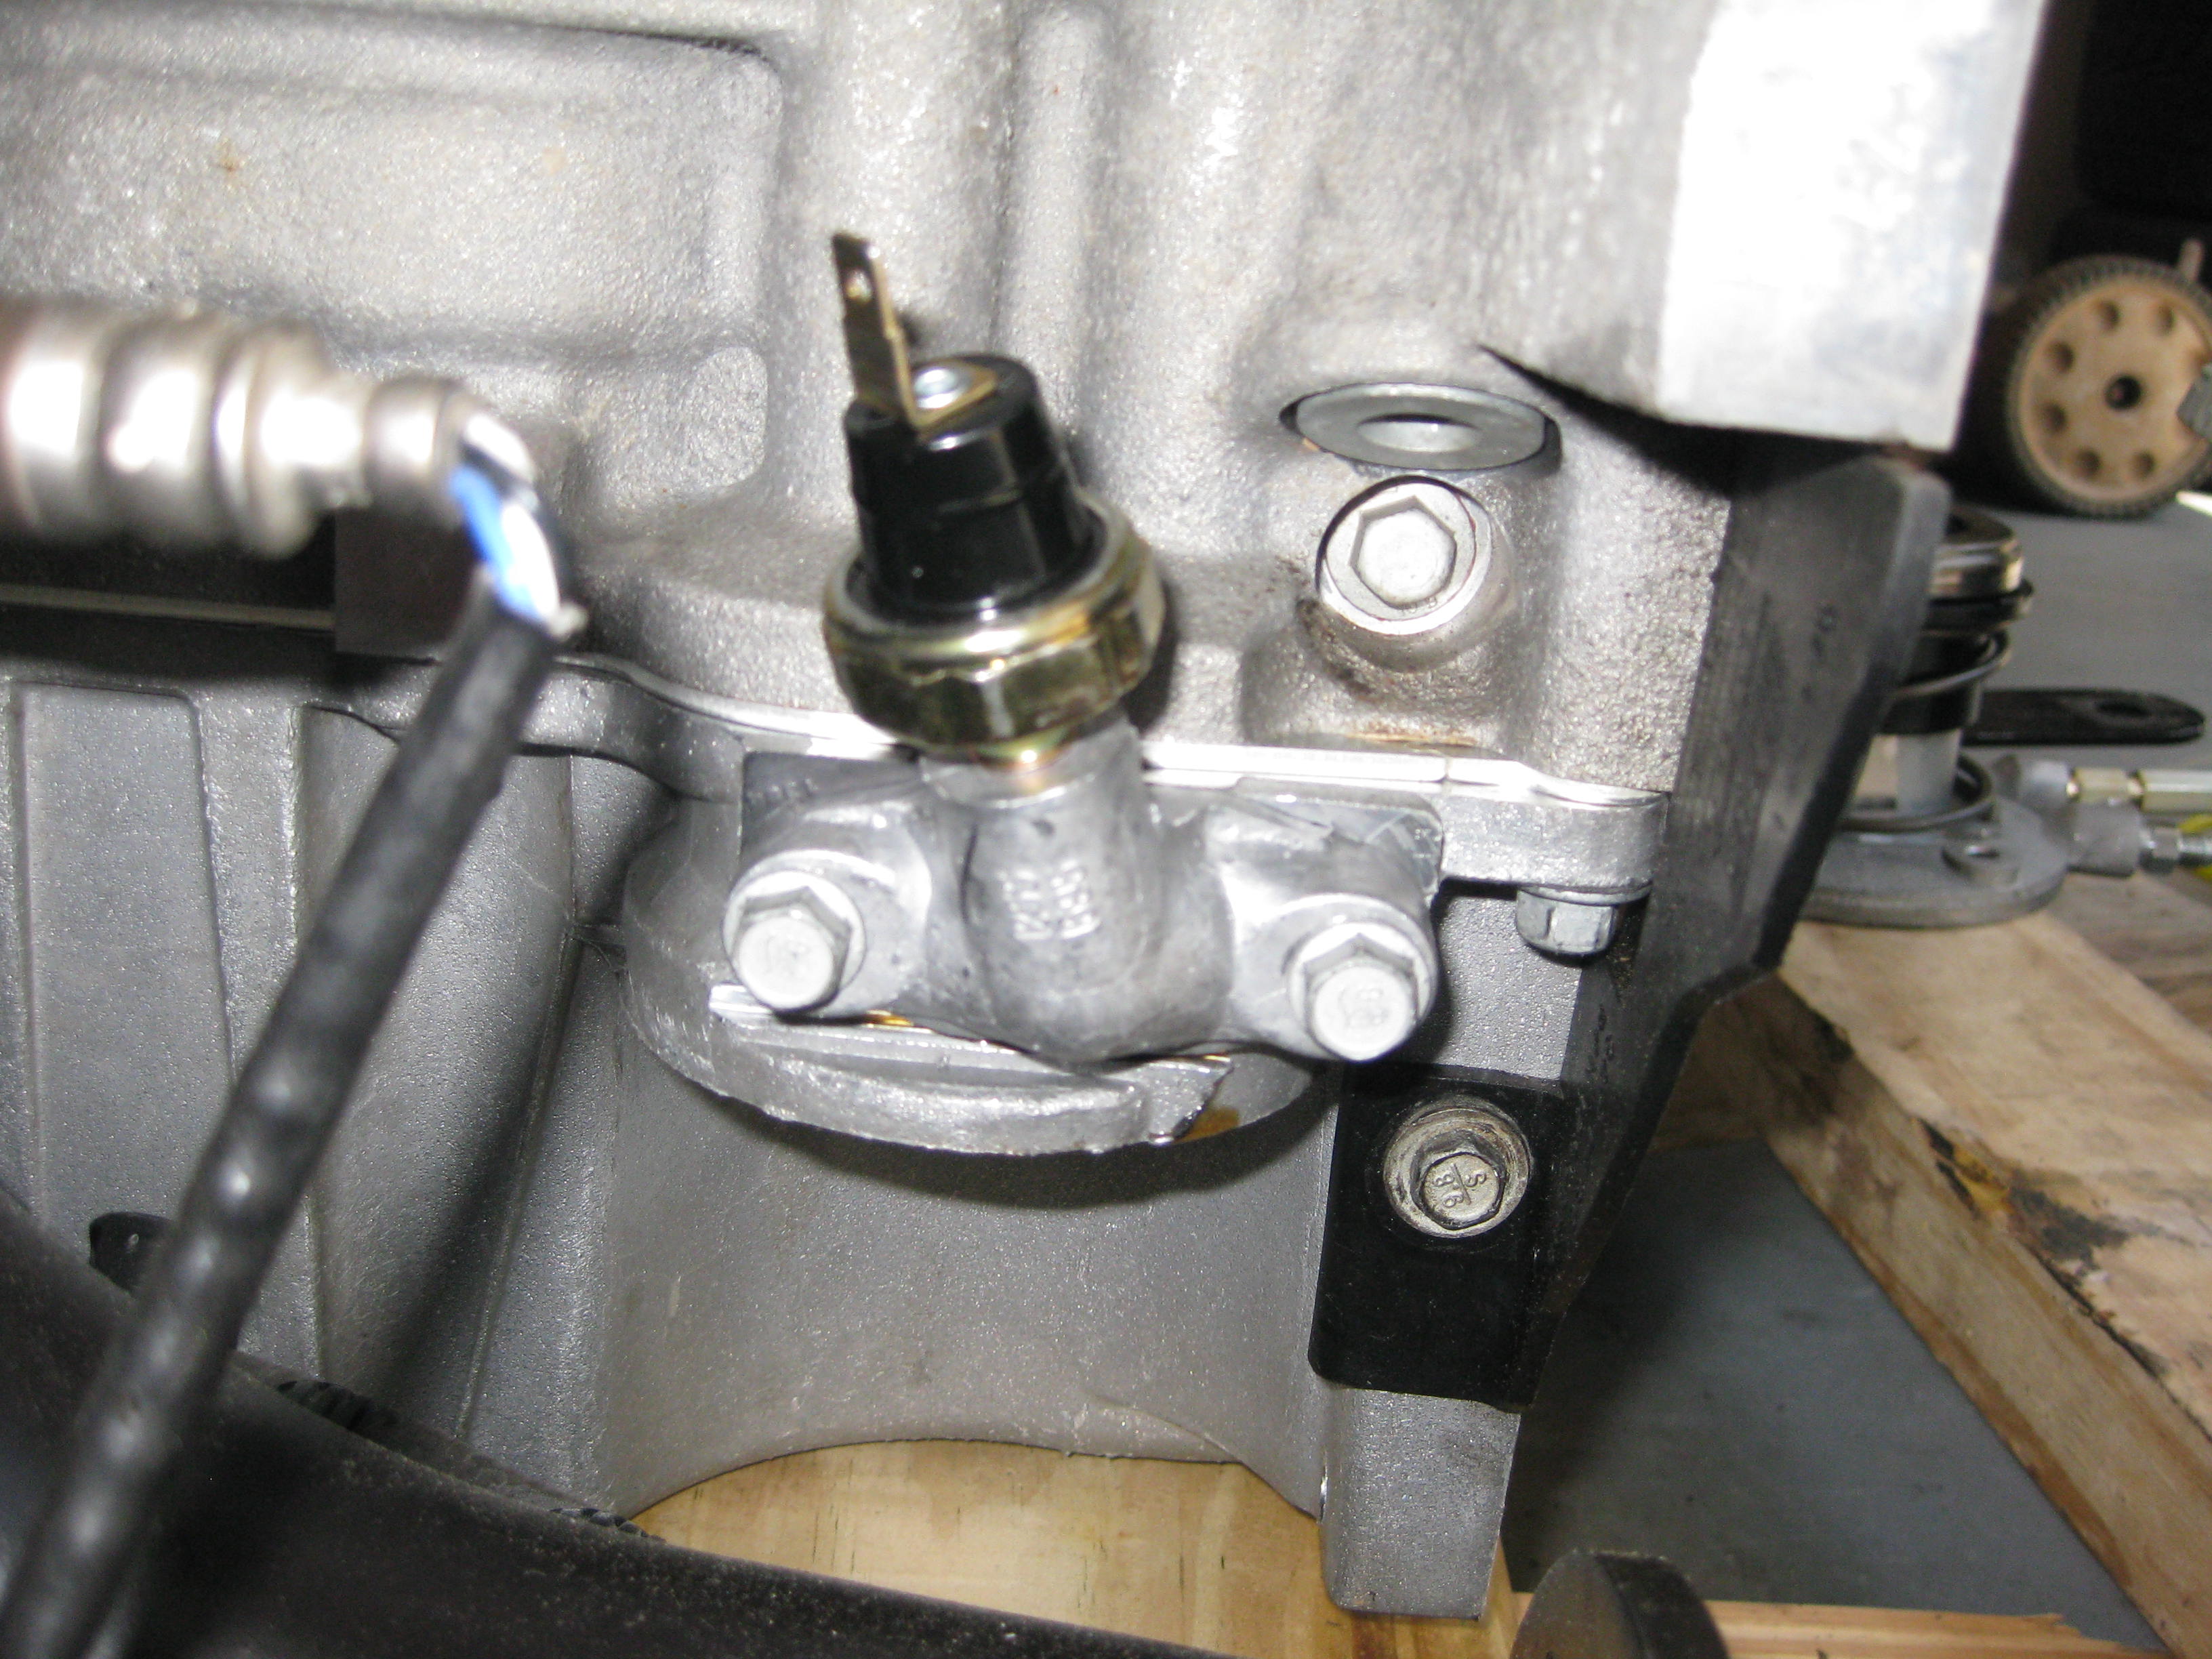
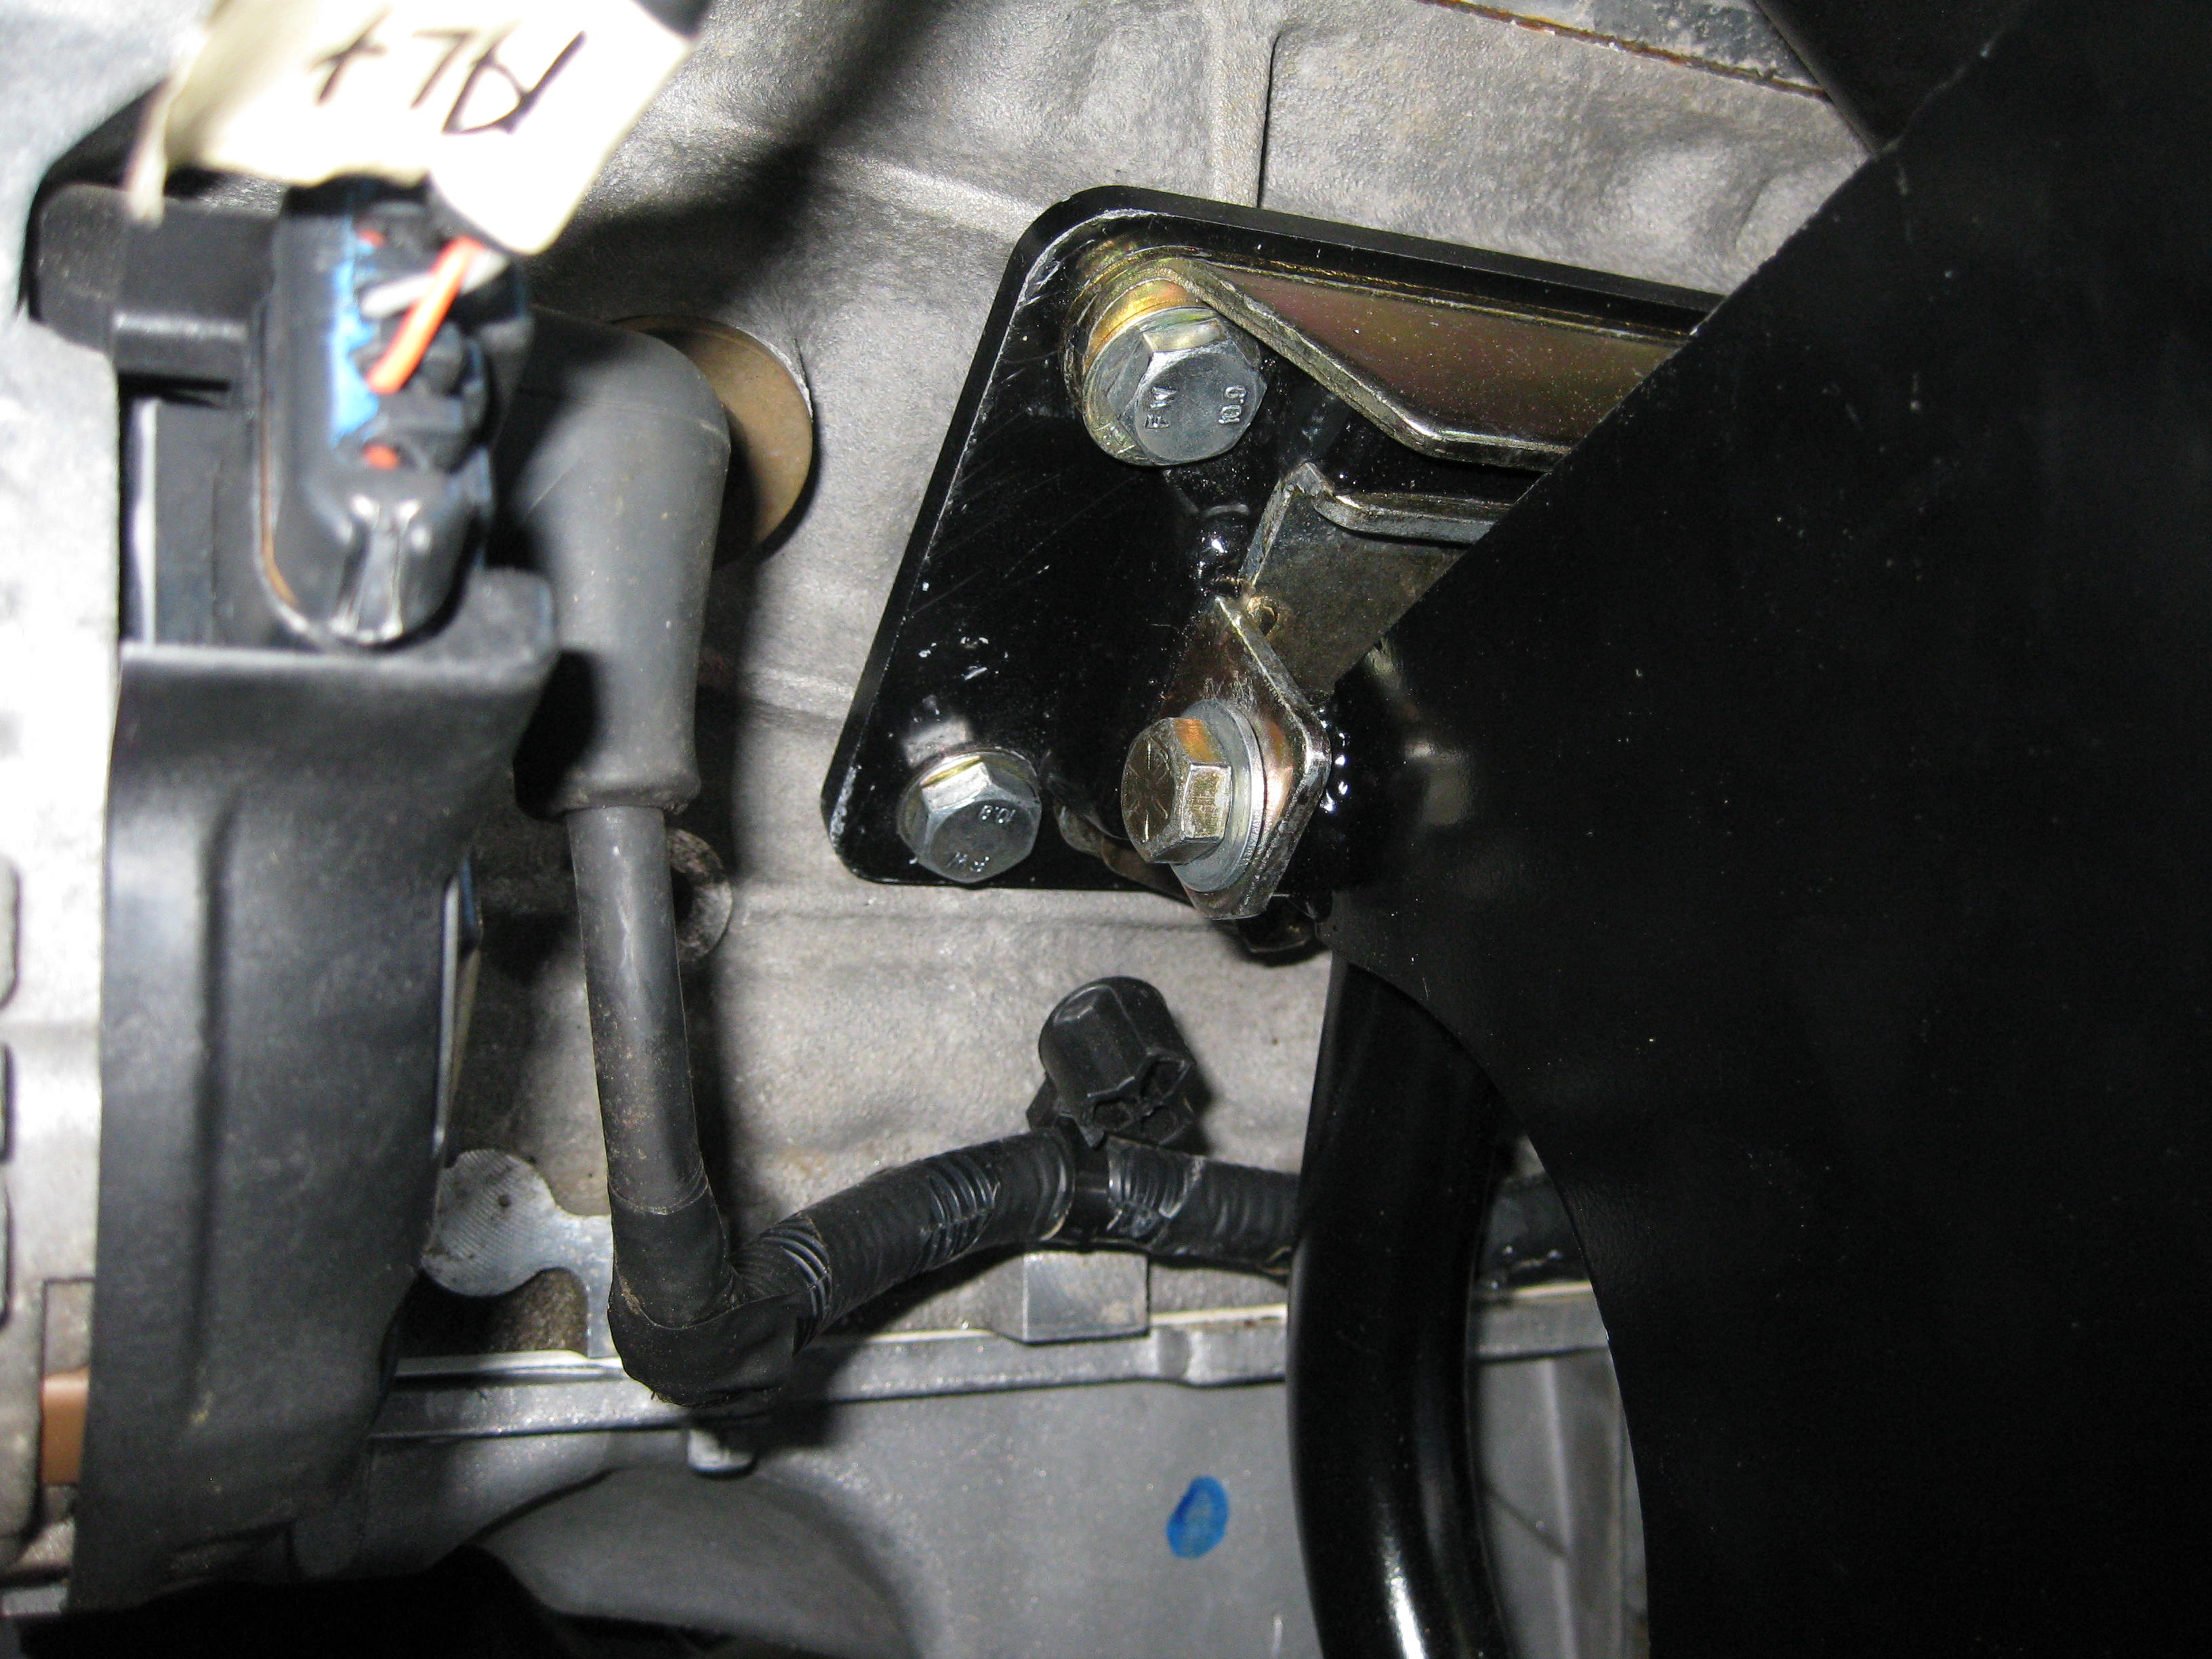
Engine mount orientation turned out to be a challenge on the directions. A picture would have done the trick. This is the left side. The key piece of information missing is that you want the mount to put the engine as far aft as possible, shared hole with mount to bracket is top and forward. We stuck the engine in 4 times before we realized it was wrong. The symmetrical nature allows you to put it in a couple different ways, allowing the tranny to be off in the tail ~3". This was a pain. The picture on the right is Wes and I standing around in dismay as to why the tranny is so far off. You will notice the diet coke and Pepto Bismol on the table. A sign of our moments that day.
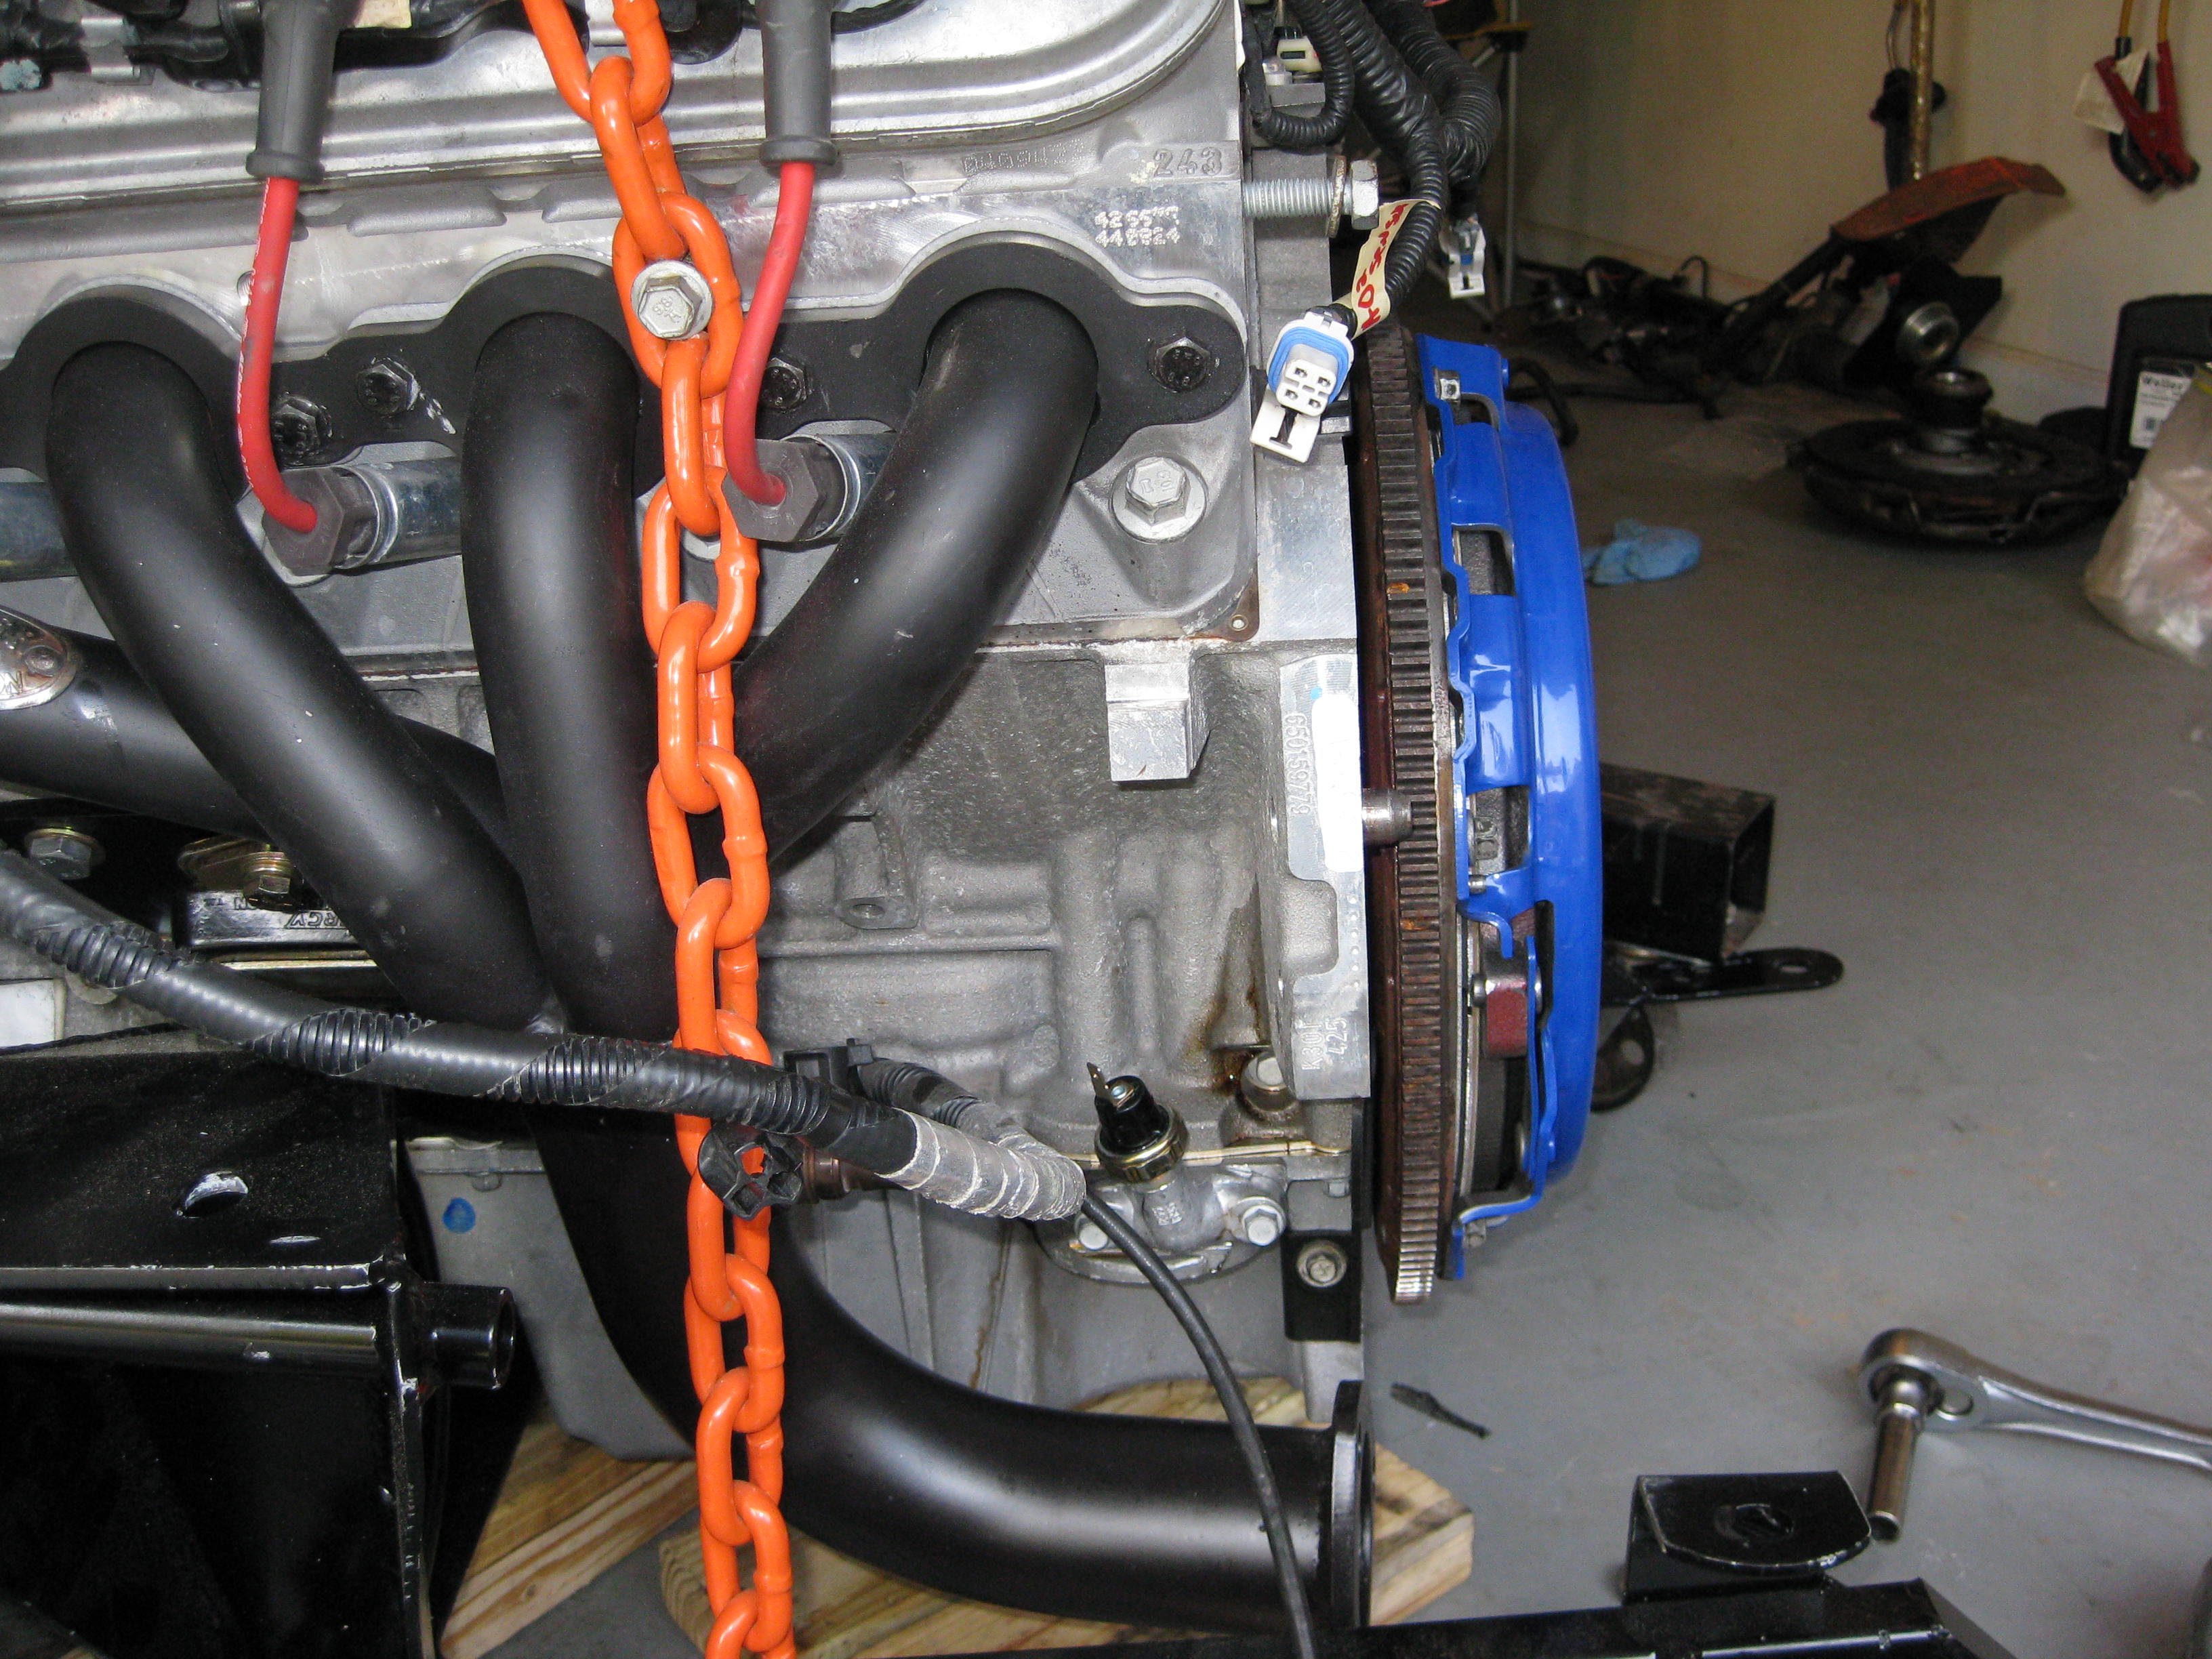
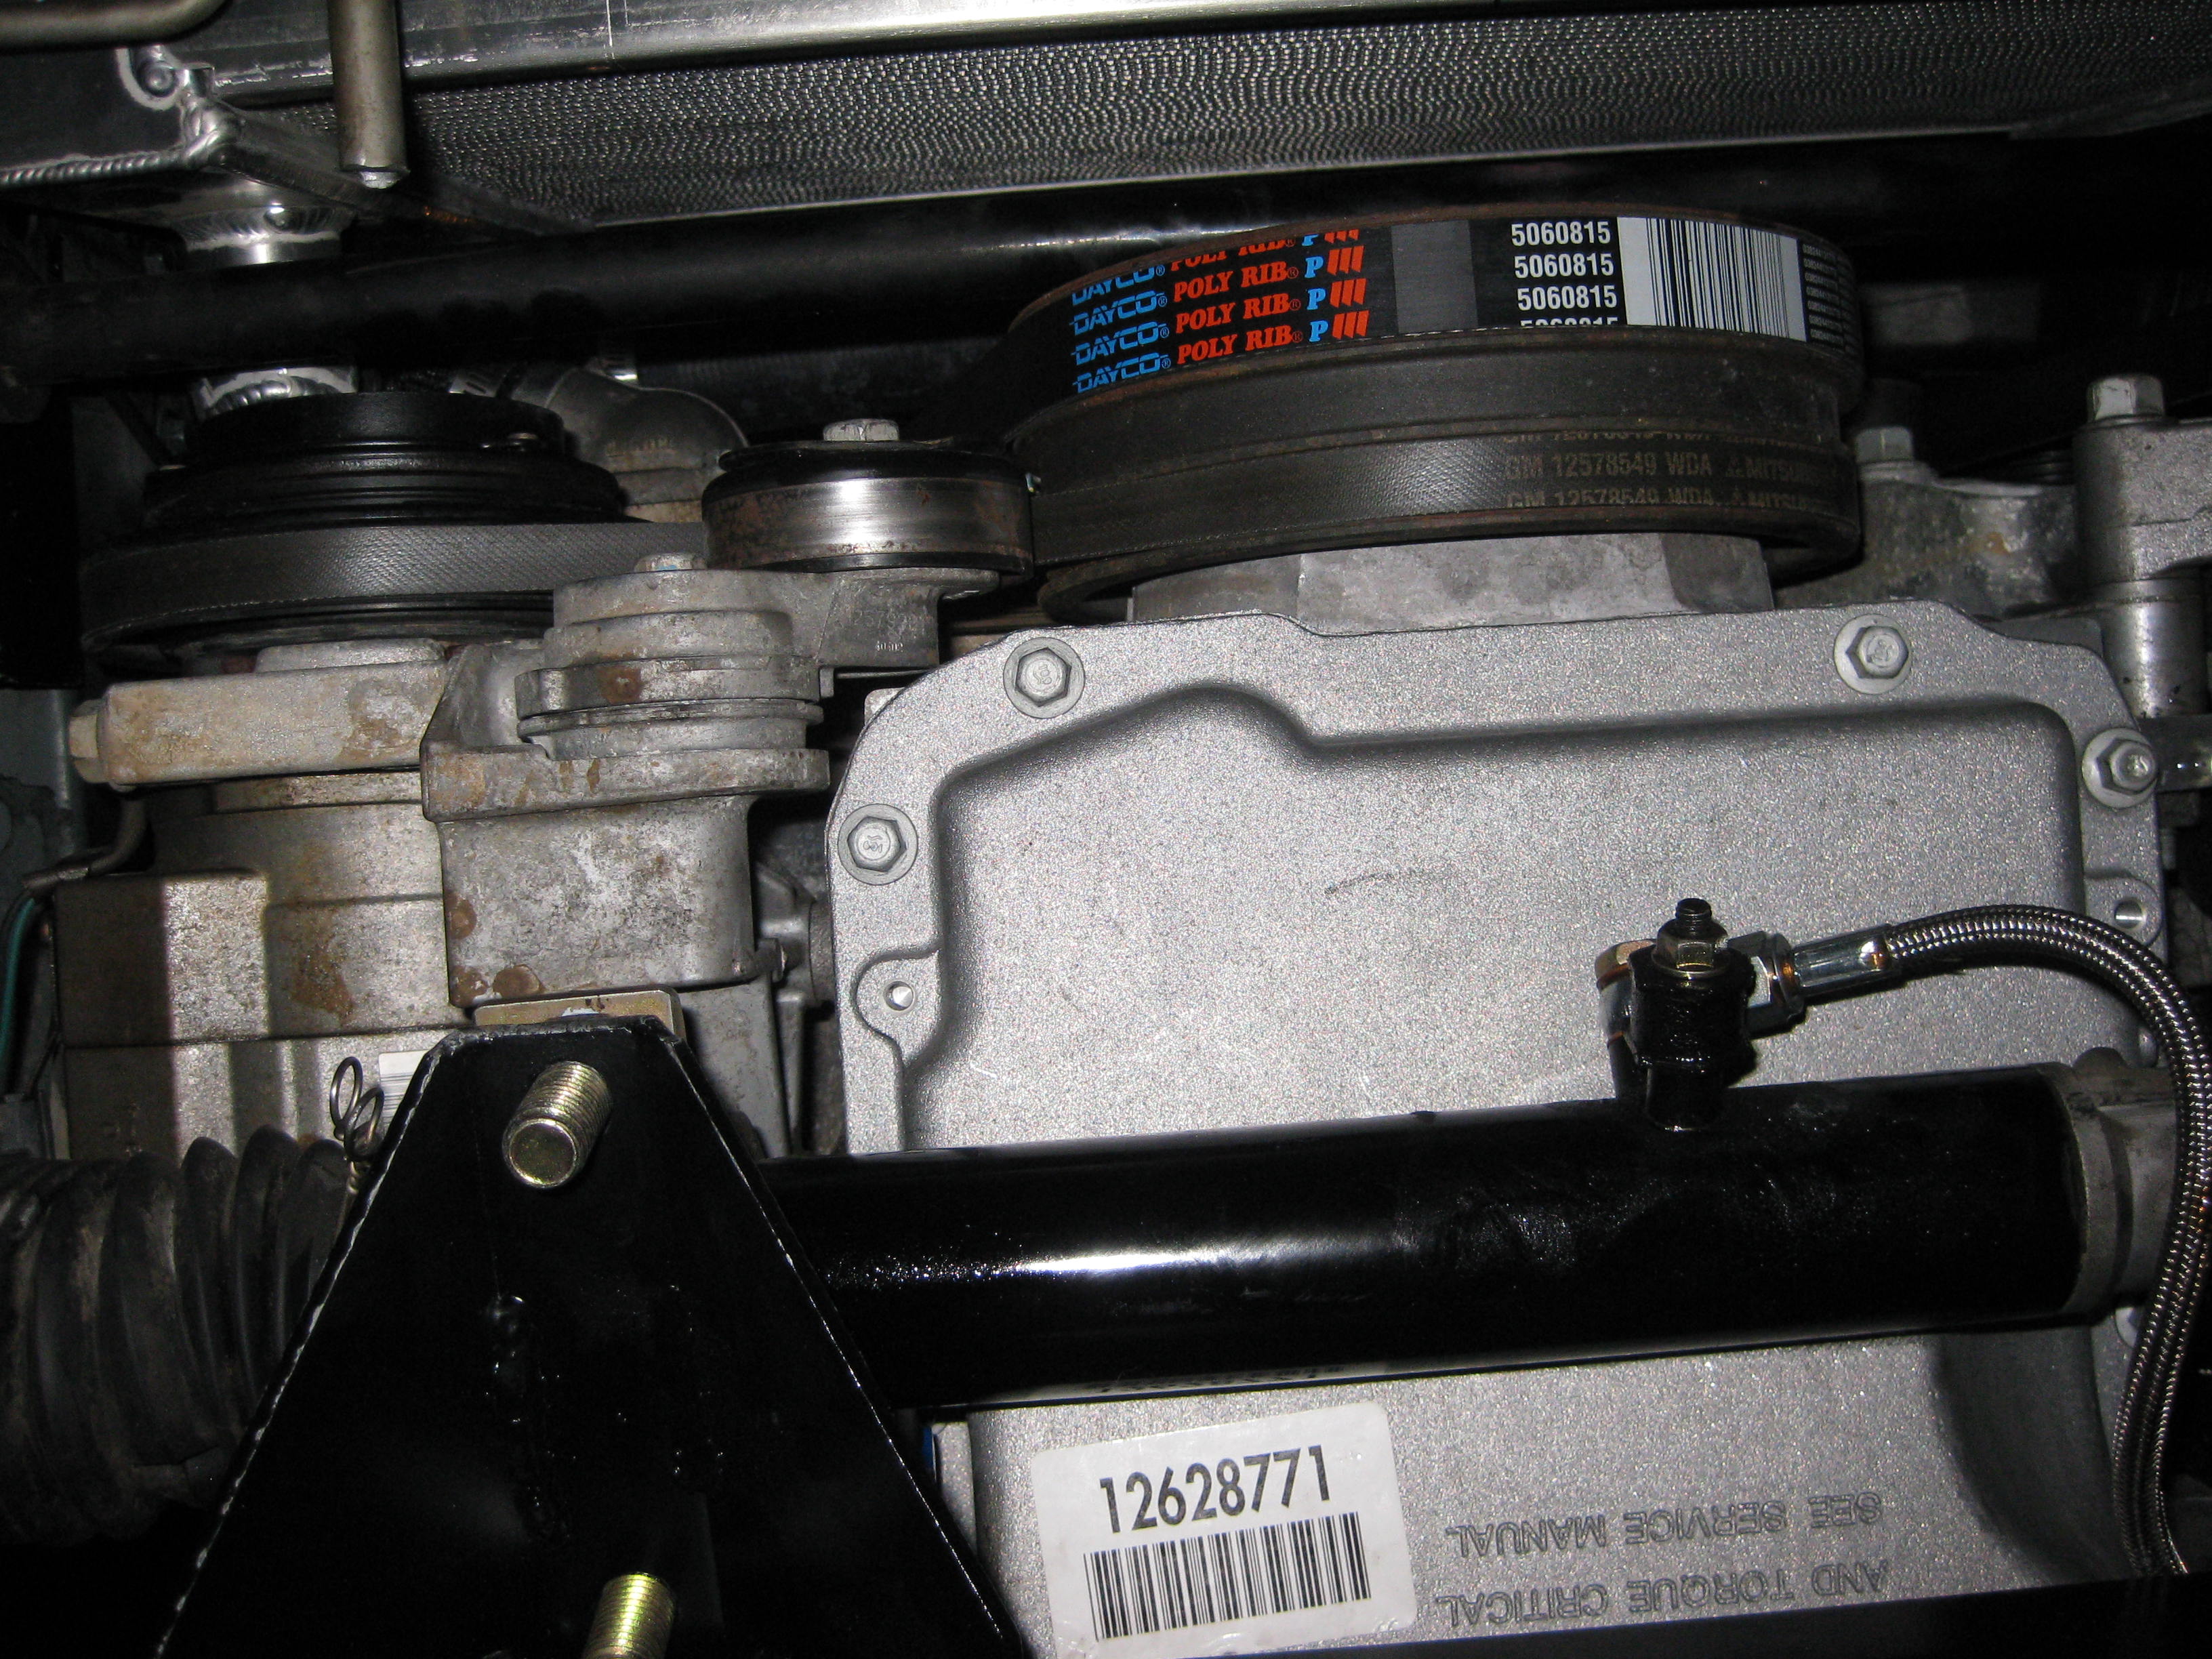
If you want your oil pressure switch to work, take the small housing above the oil filter off and drill out the cavity with a small drill bit. Then thread in your oil pressure switch. Hook it up to your old switch wire. Oil pressure gage is not compatible between the LS6 and the Miata
.
Torsion Bar
The torsion bar has to be moved forward to clear the crank pulley. The steel plates were a bit of a head scratcher in terms of how to install them. Orientation was a challenge. After installation, Im not sure I like the geometry on the torsion bar now. I may look into this later.


Steering Knuckle Extension
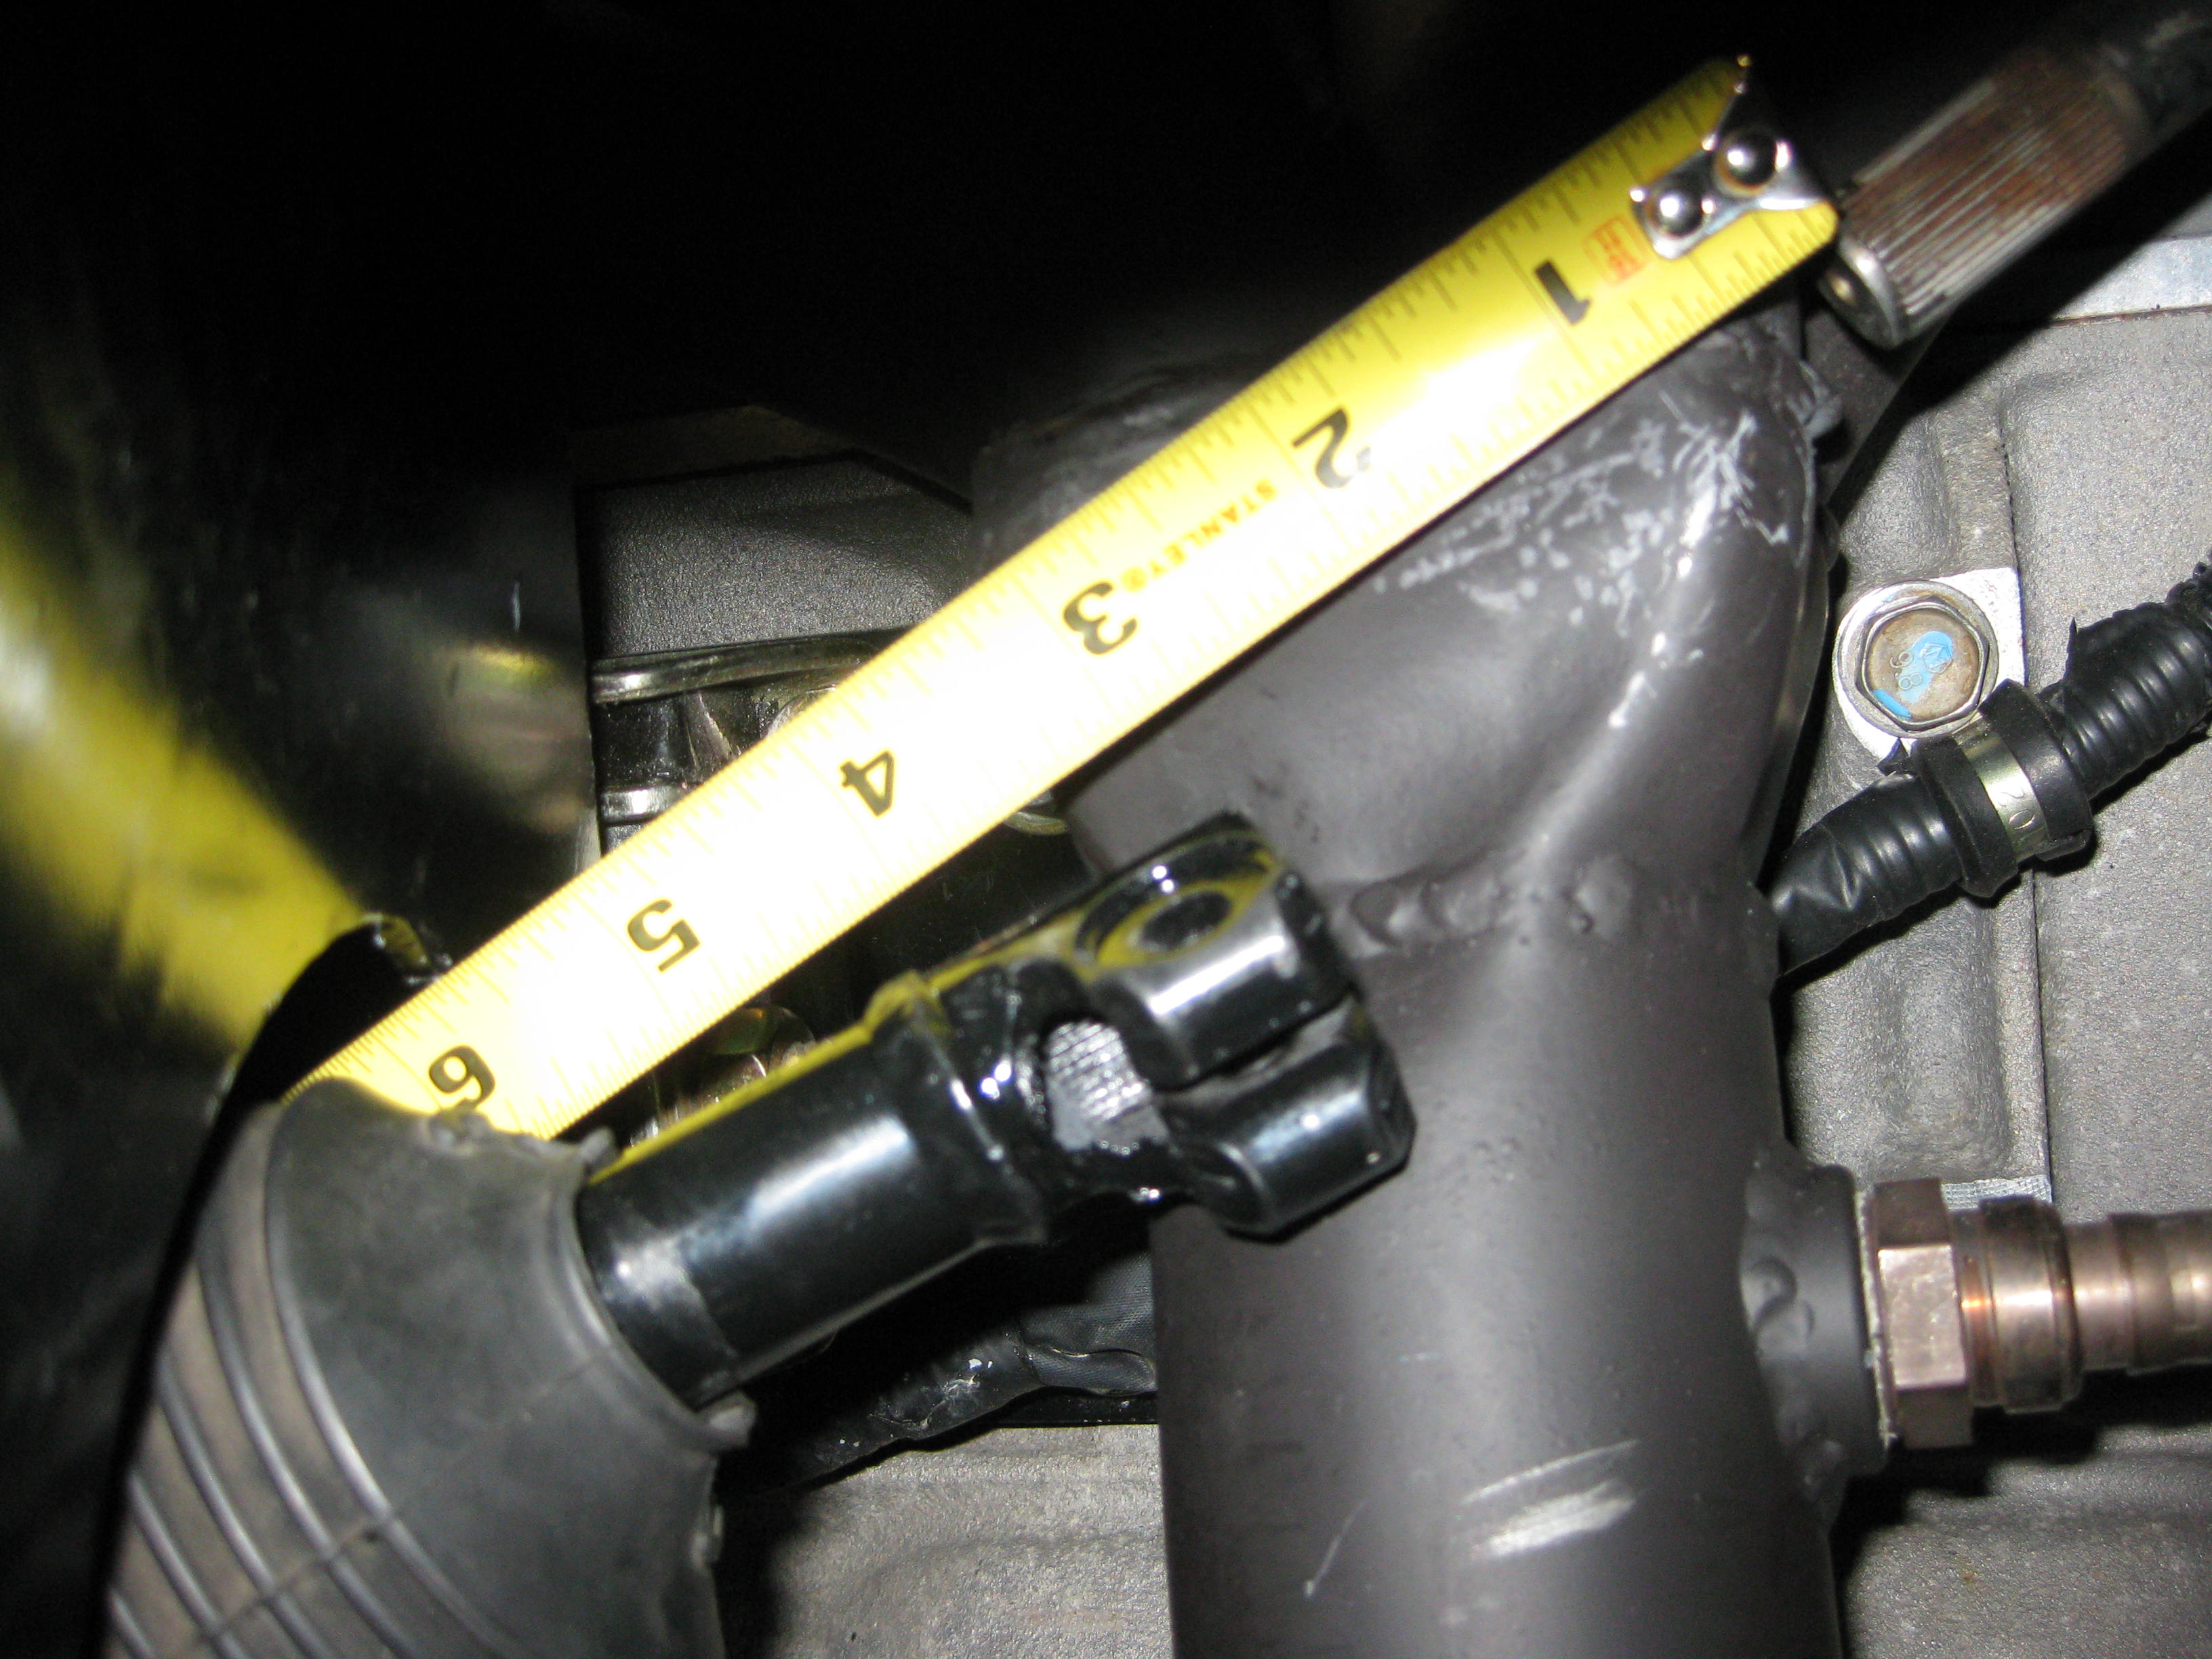
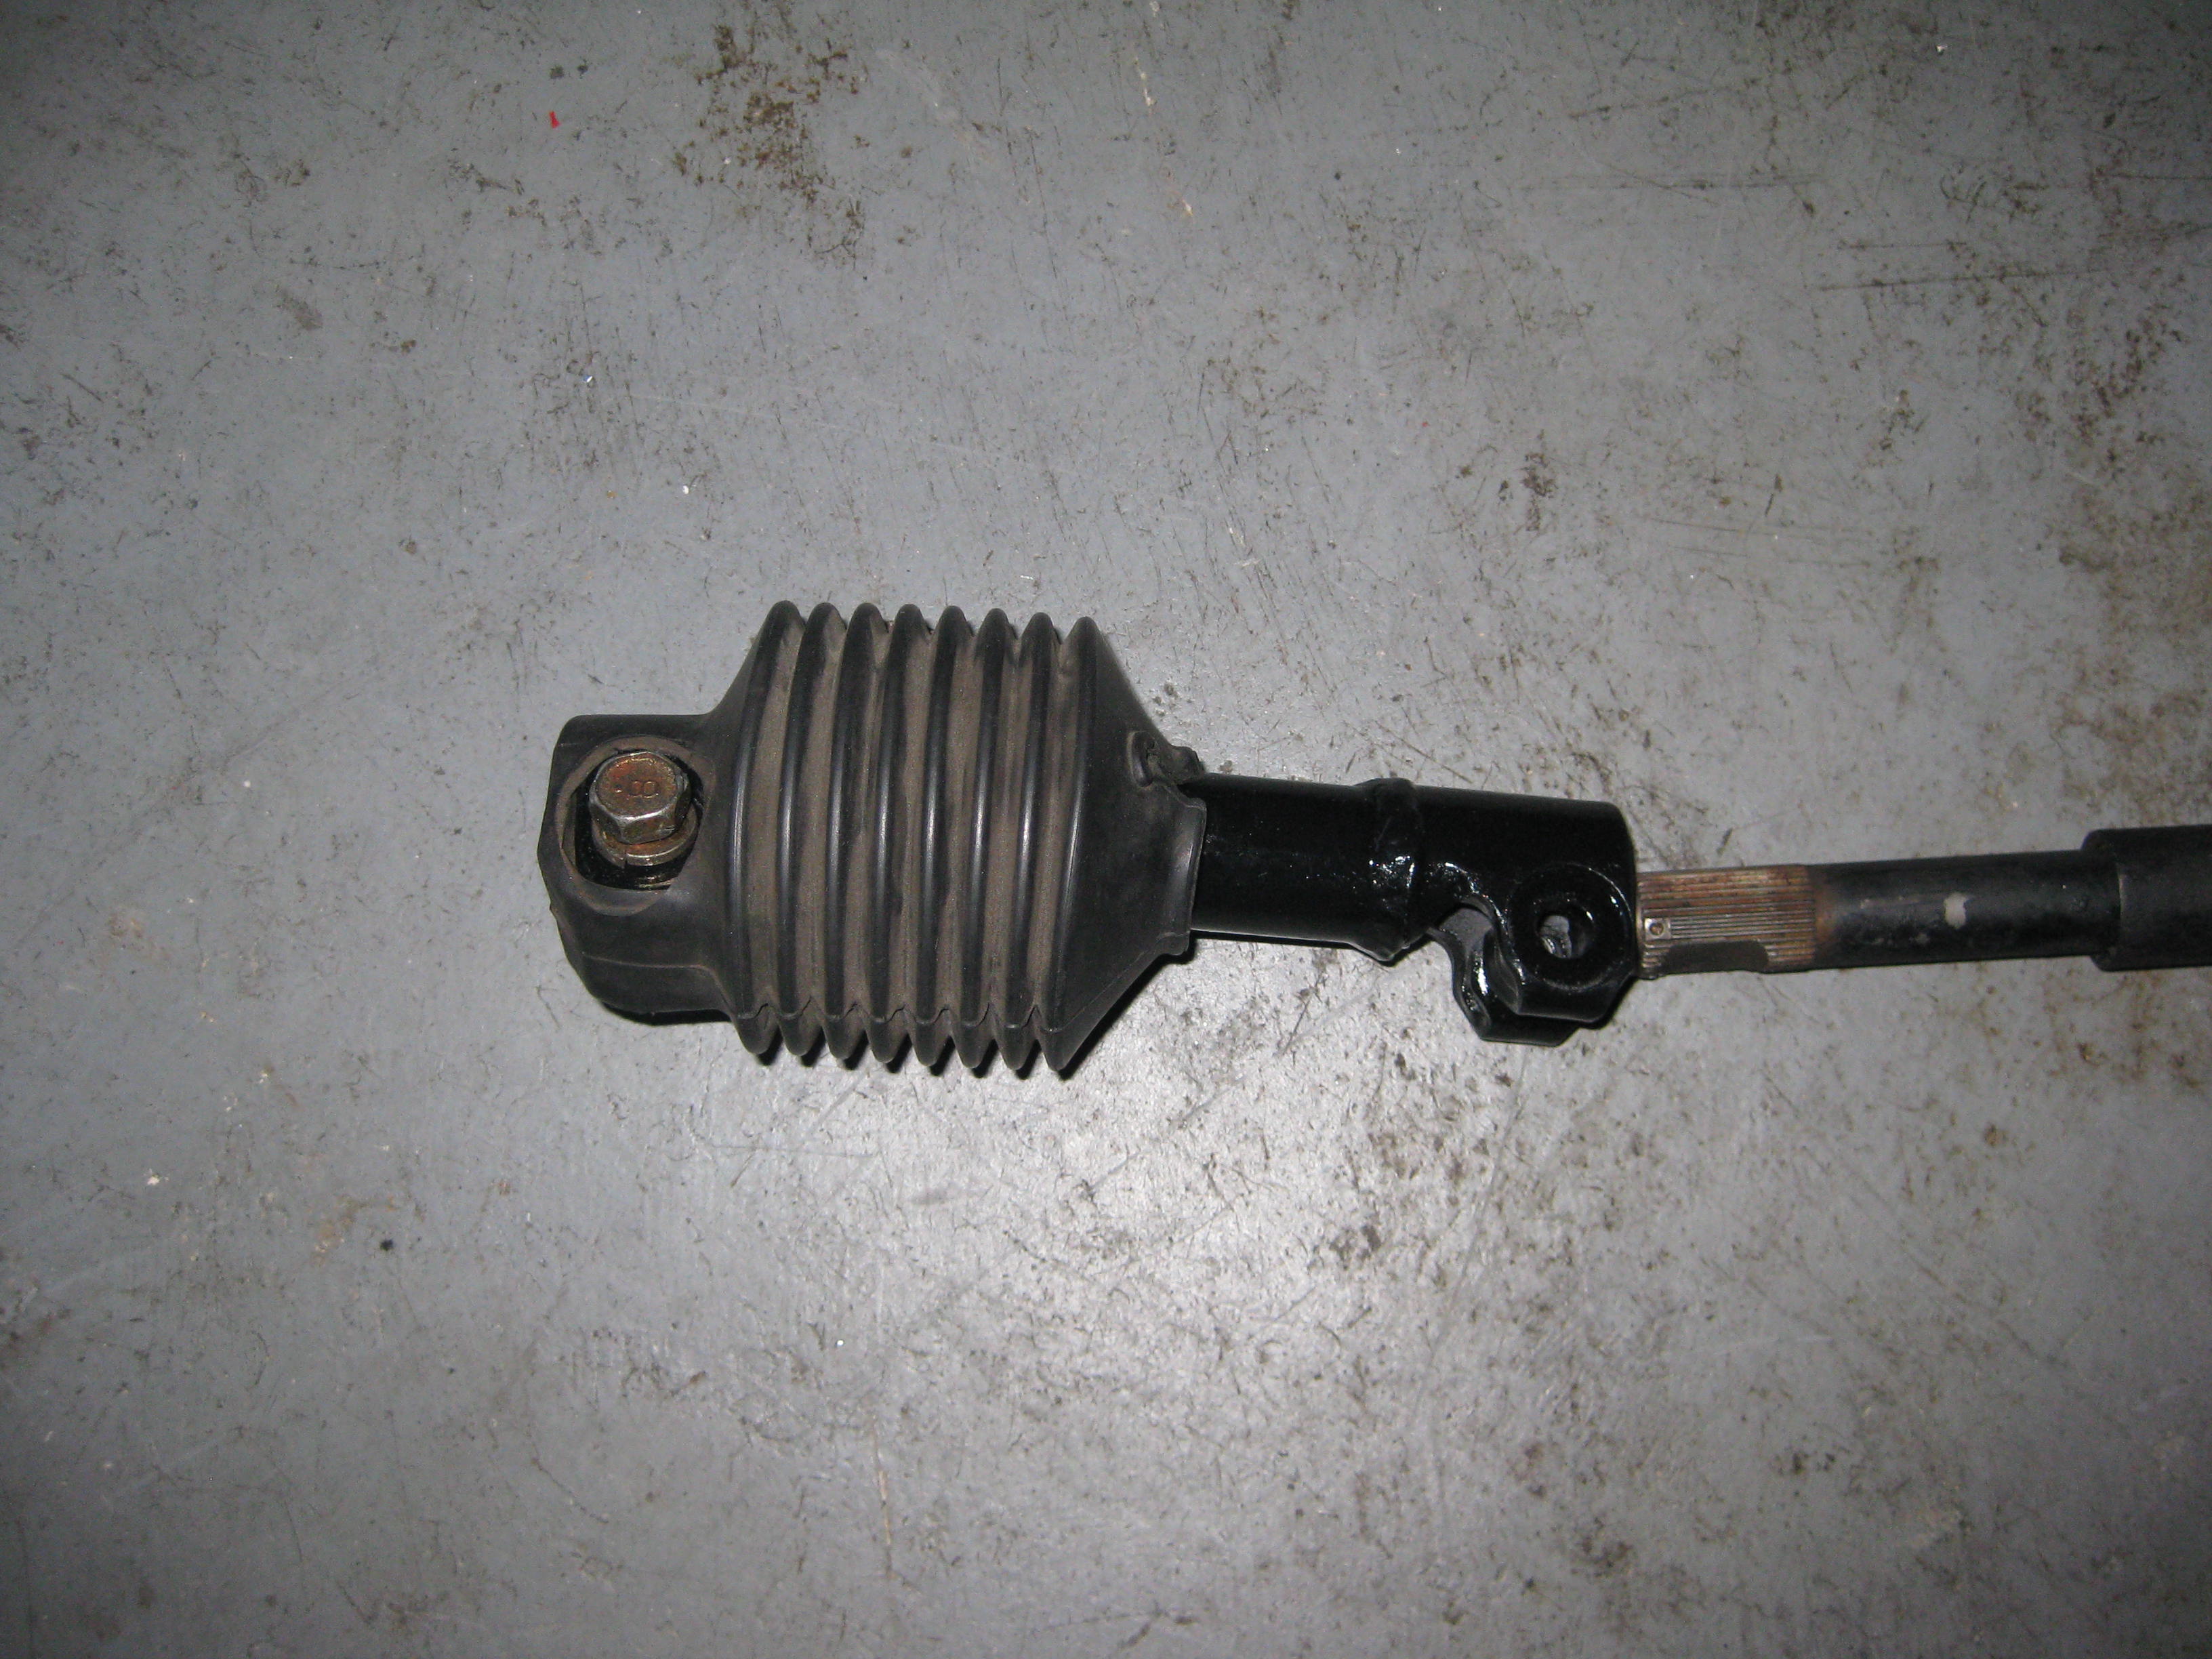
The steering rack sits further forward, hence the steering linkage must be extended. Ric and BF will do this for you. Send him your knuckle, and back comes the extended version.
Warning... Dont be an idiot like me.
1. I waited until the end of the project ot send this to him. He turns it around quickly. But my project sat a few days without progress since I waited to send it.
2. Biggest idiot move... Turns out the steering column rod from the interior through the firewall is collapsible. 3.5". I did not know this and thought my rig was too short. DUH!. The rod extends and collapses 3.5". It can take some gentle persuasion to get it to go in and out, but it will go.
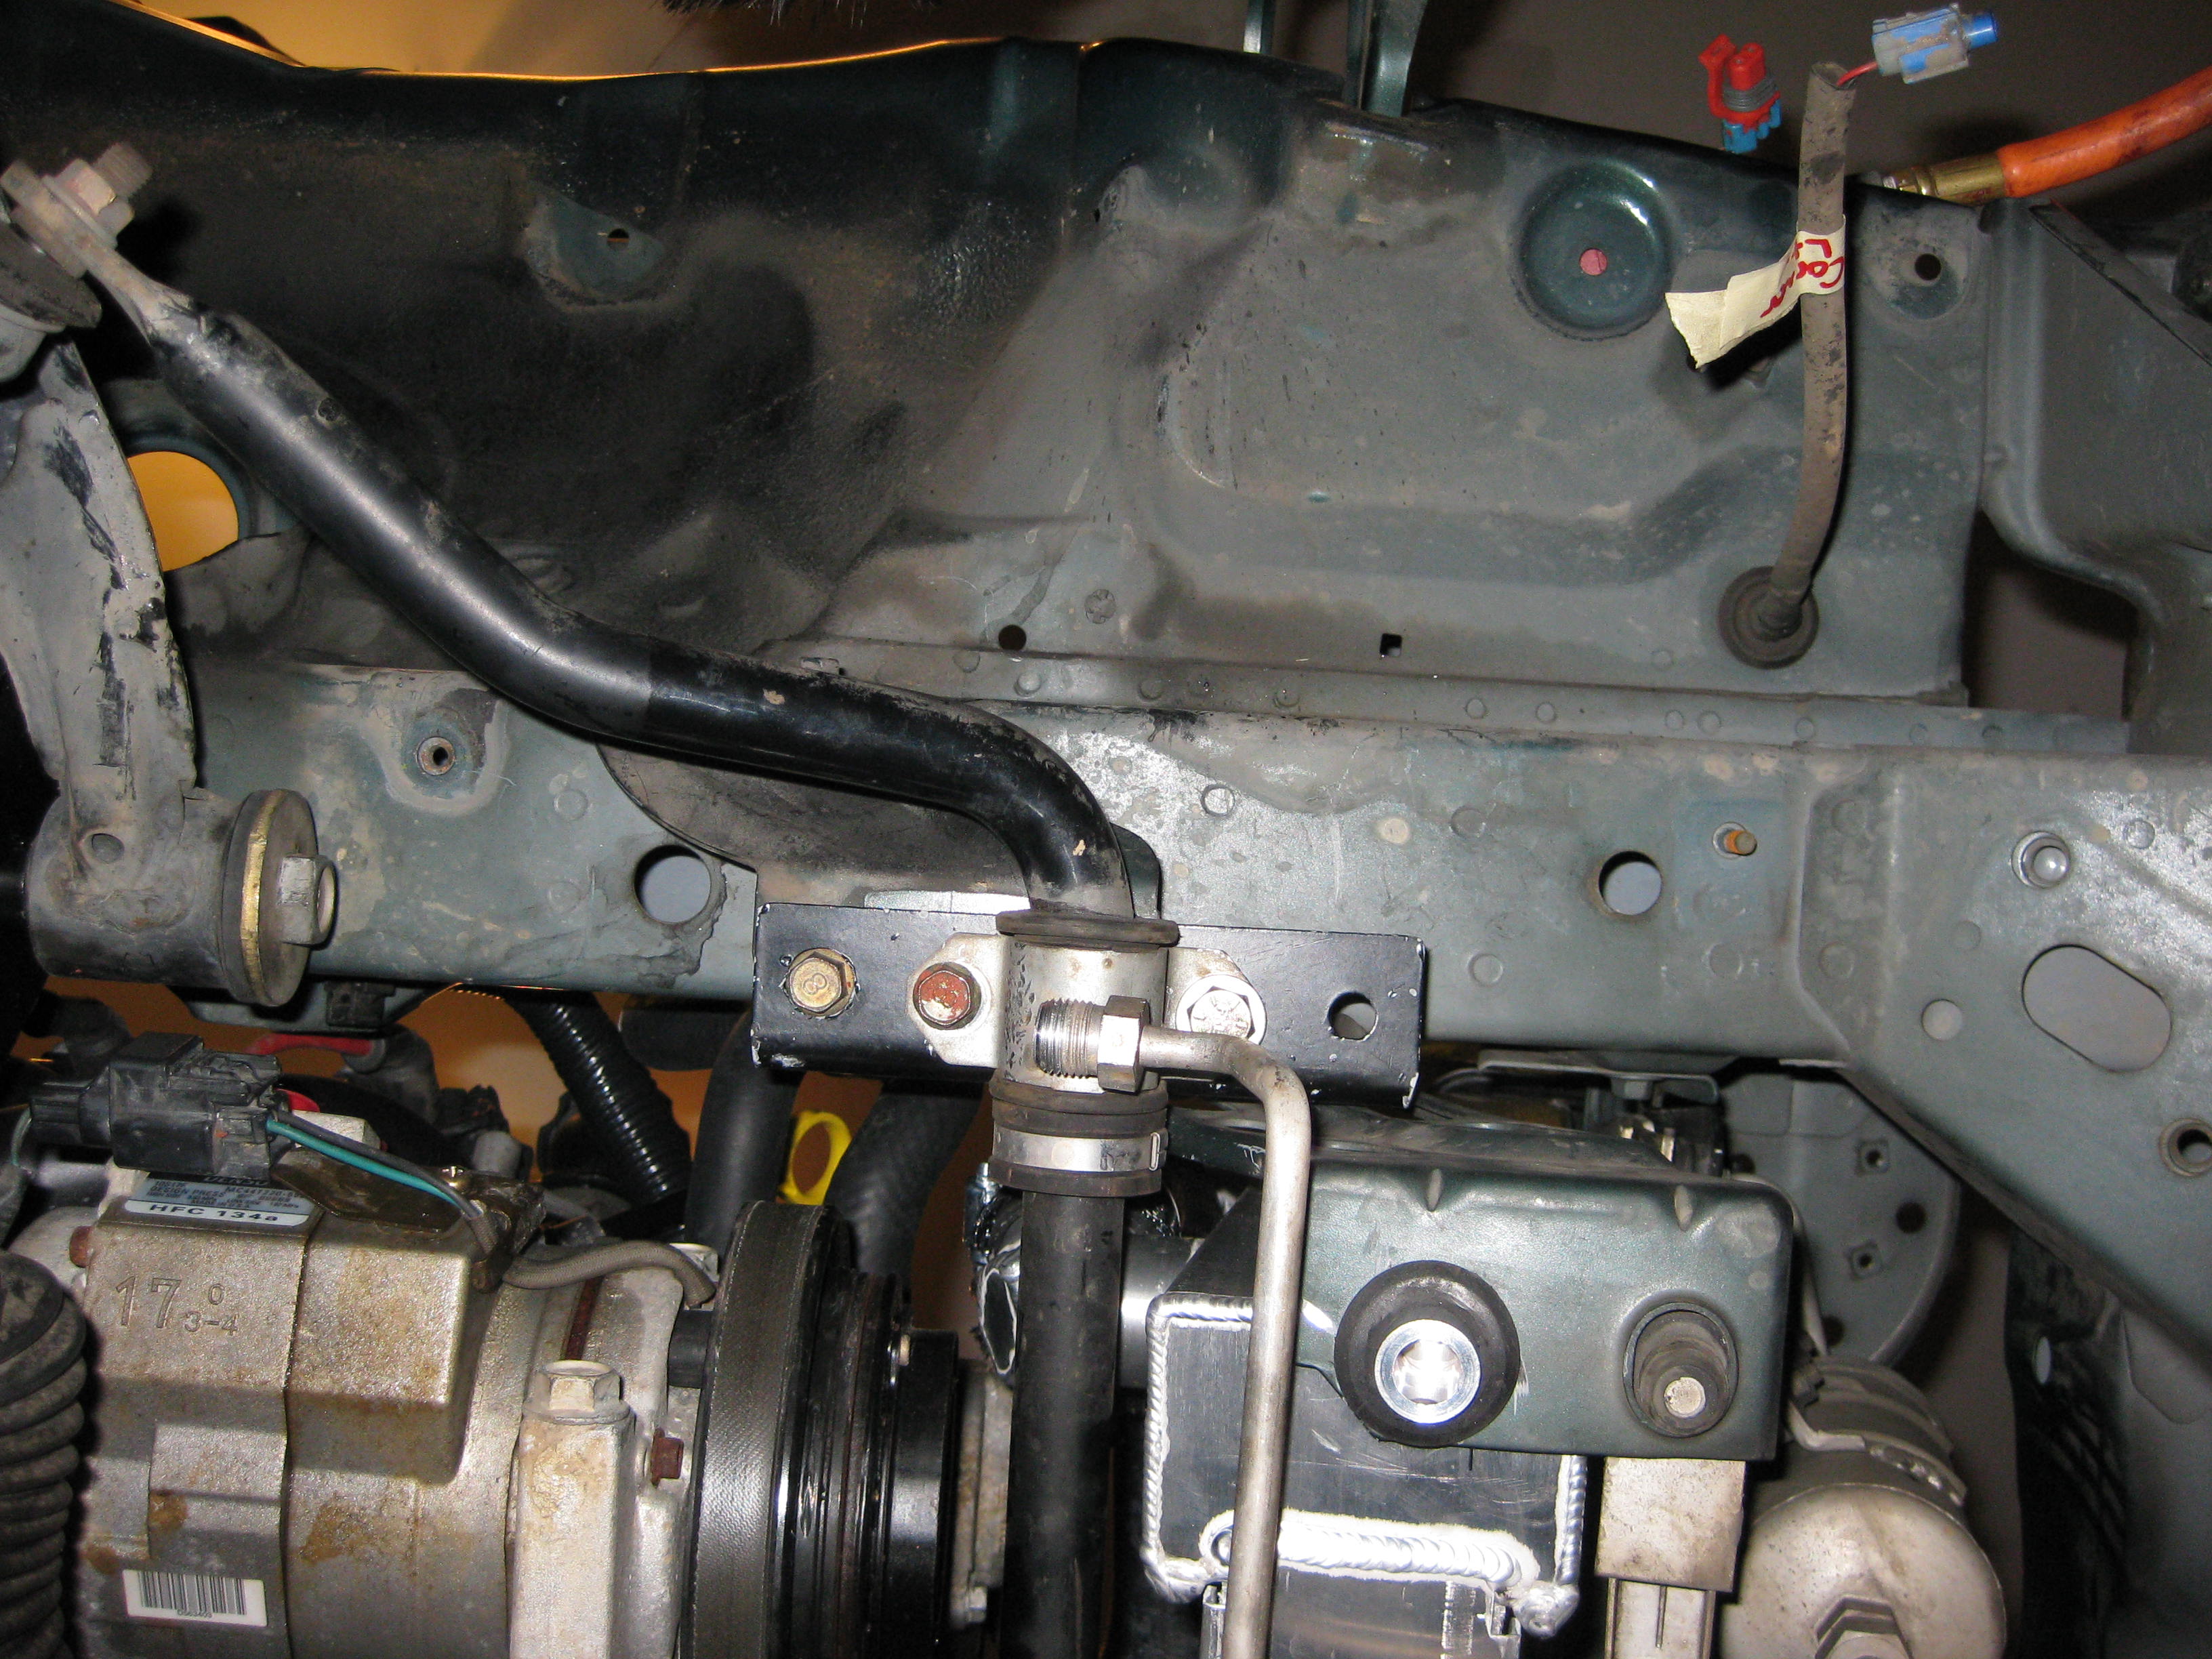
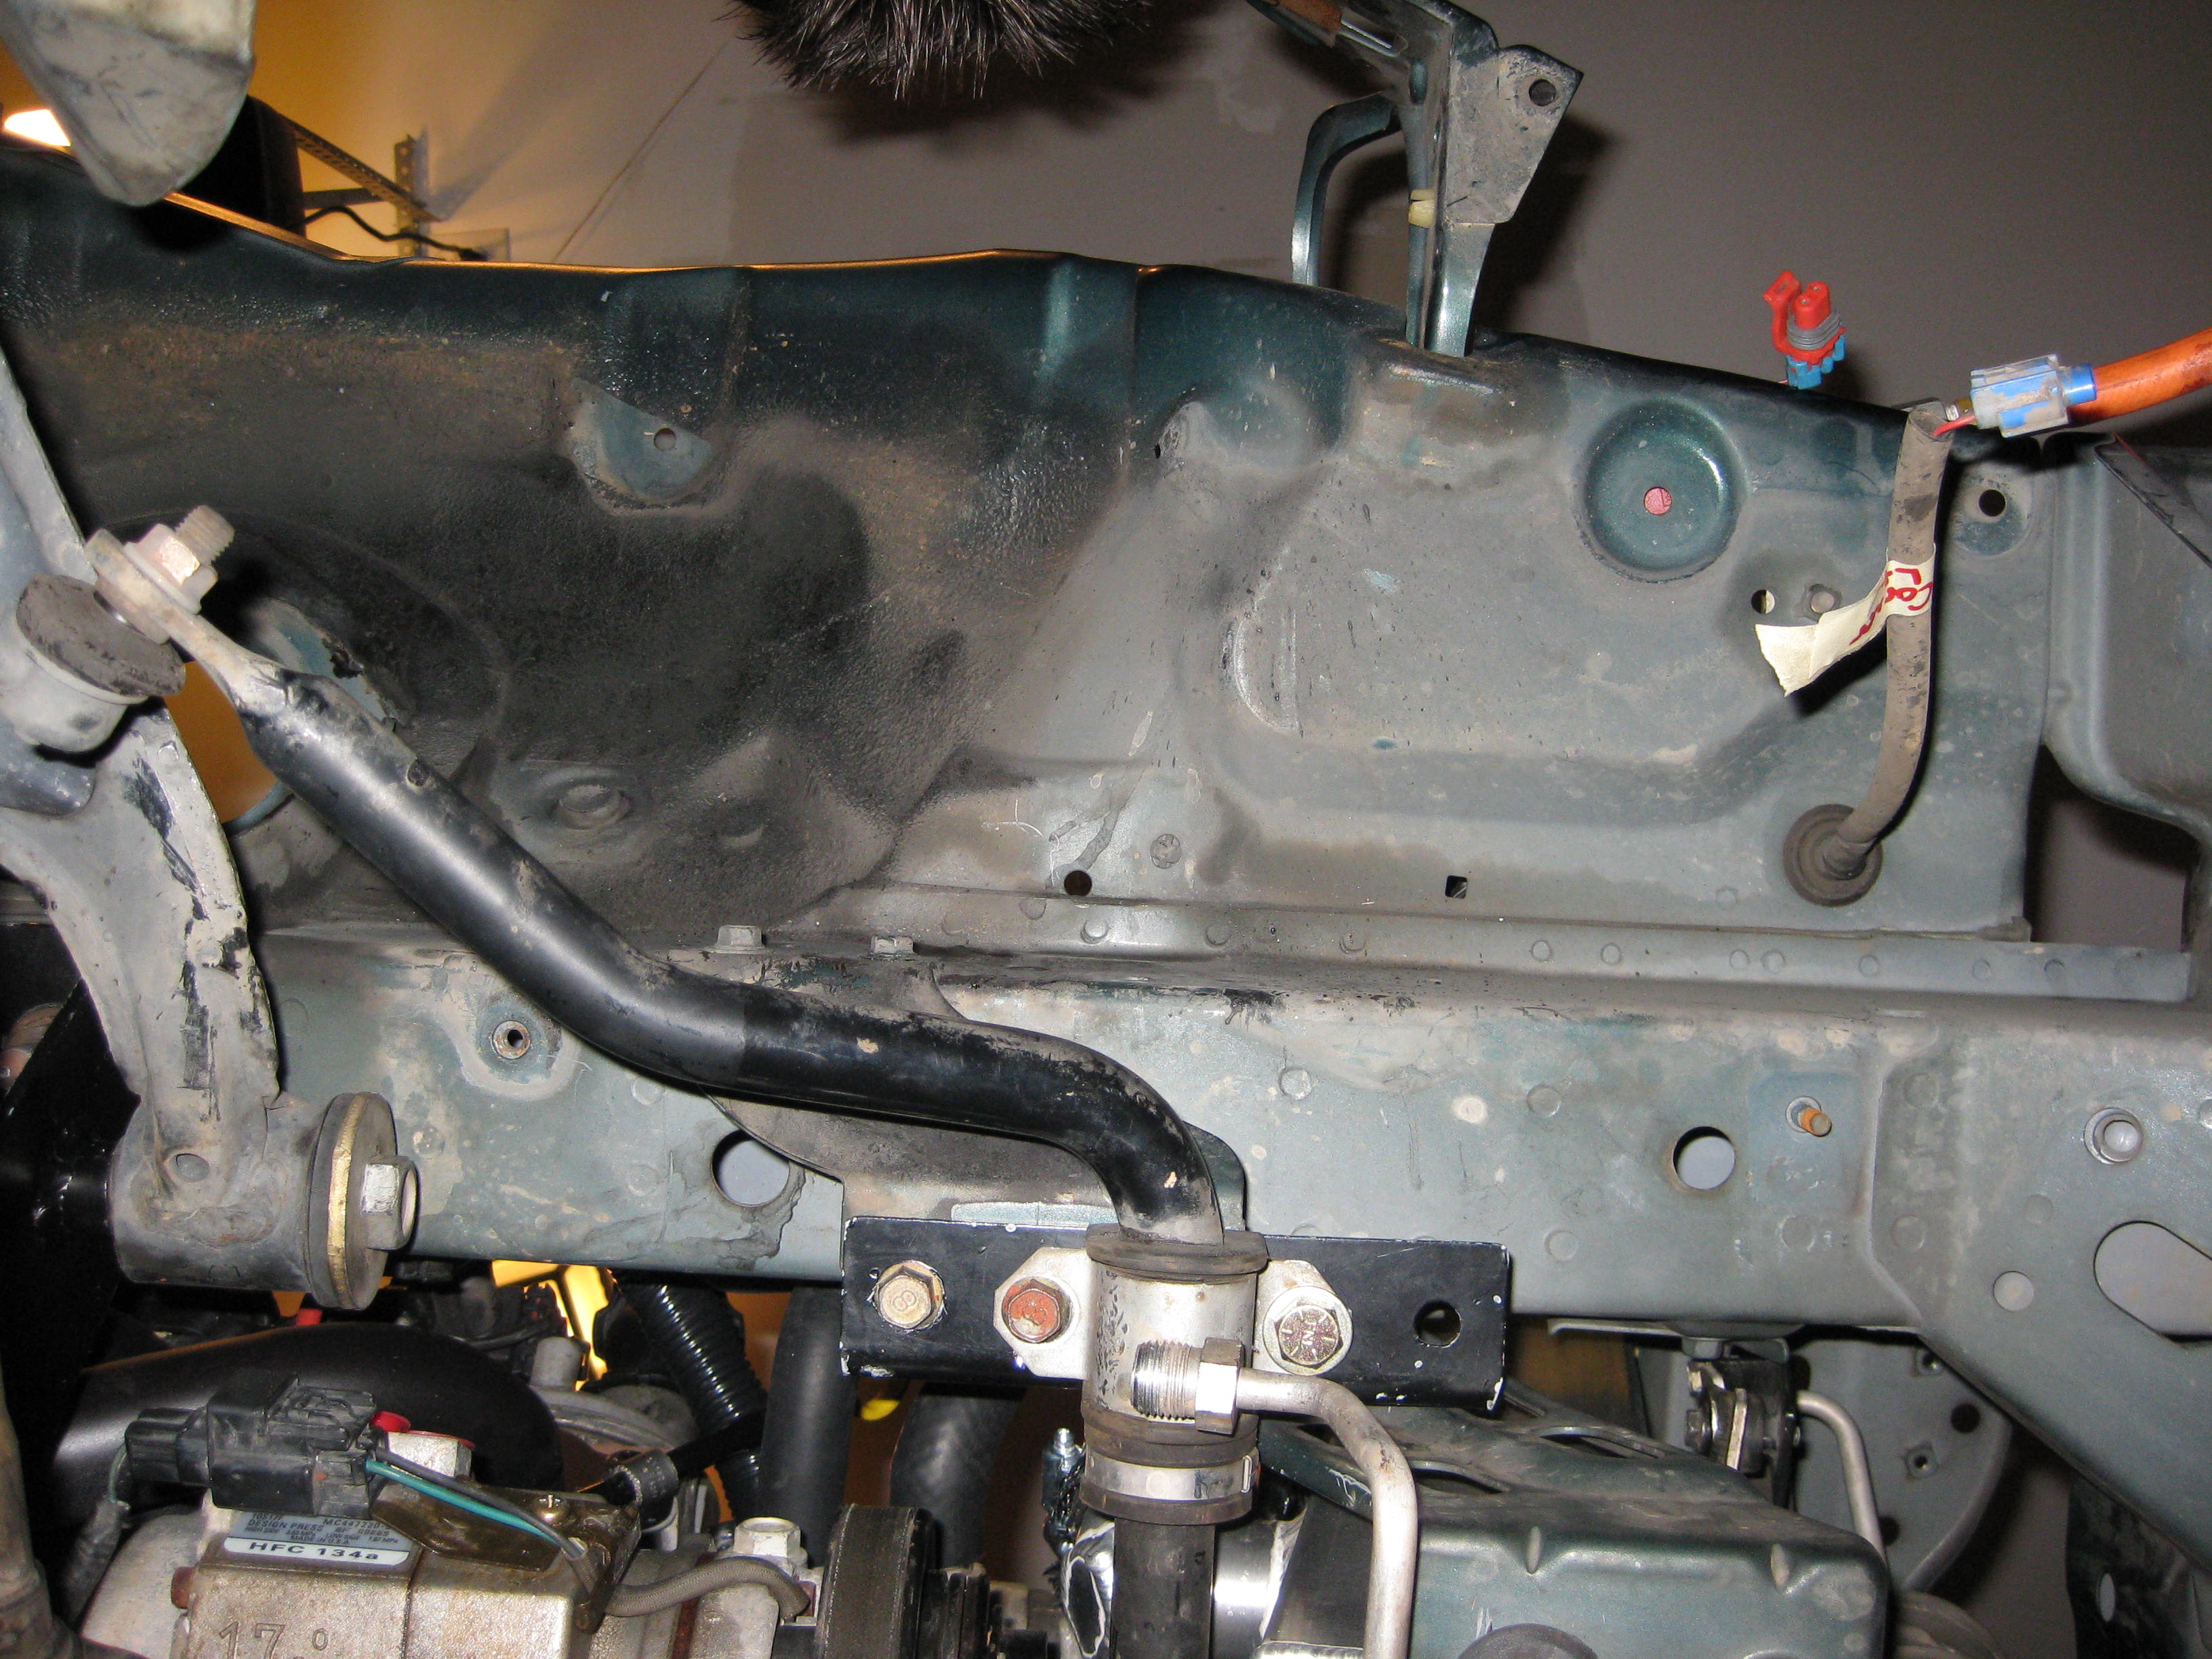
Power Steering Reservoir
The power steering reservoir on the LS6 comes attached to the engine and on top of the pump. It sits about .5" too high for the hood to close. It must be moved to the fender well. GOod news here that no line changes are required. Remove the 2 bolds holding the reservoir on, and rotate it by loosening the clamps on the hoses. I made a cheesy bracket for now to get me by.


And the final setup.
Update March 2012
The engine mounts melted on both sides after 10k miles and 1.5 years of running. I do not know at what point they did melt. Only that I found them melted at 10k miles. They are very close to the headers. Both melted away. I took some aircraft sheet .032 aluminum and built a shroud. Should have taken a picture of the shroud when it was out of the car but I didn't. I had heard of this happening before but did not take any action during the build. Shame on me. I found it during an engine/transmission pull out to fix a rear main seal leak. Thank goodness I spotted it.