I had the dreaded tank leak. One of the most despised items on the airplane. After doing all the work on the tanks... to find out they leak was like waking up with your left arm cut off. Extremely depressing.
As it turned out the repair was not all that difficult, and one I think would work for many people. I have given 2 techniques, both of which are my inventions, as I could not find any credible repair techniques on the web. BTW, for those familiar with "sloshing the tanks" with that goop sealing stuff, I decided it was not an option for me for 2 reasons. First, I have capacitive sending units in my tanks... meaning small electric currents pass from pieces of metal inside the tank. If coated with the sloshing goop, I feared inaccurate reading due to a resistance change from the goop. Second, I have heard of "gasoline" eating this stuff up over time, and even though I will run an aviation engine, on aviation fuel, a future owner may decide that an automotive engine is his/her choice. So "sloshing" the tank was out.
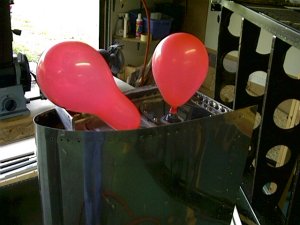
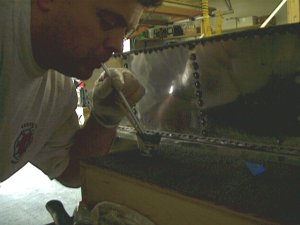
A very simple process. Put balloons over your fuel and vent lines, pump air into the tank(slowly) through the drain petcock, spray the tank down generously with a spray bottle filled with water and 1 ounce of liquid disk soap, and cross your fingers.
If your unluckly like me, you'll see this.... bubbles
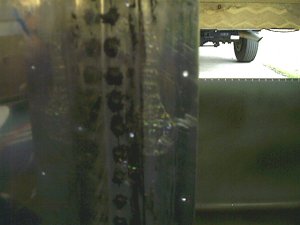
 Rats!!
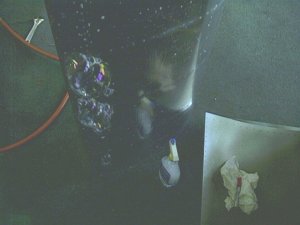
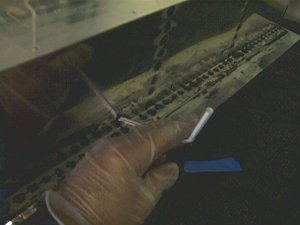
This is the rear baffle leaking, I also had one rivet middle of skin on top, that leaked. I replaced the rivet with a blind rivet coated with "proseal" (see tank building section for details on this stuff) and it worked. Don't ask me how this baffle leak happened cause I got enough proseal in there to choke a horse, but it leaked none the less. I put the testing of the tanks off for months cause I really didn't want to know if they leaked. But the day came where I had to do it. The good news was the fix was very easy. I have 2 methods, one is the straw method for covering a larger area, the other is the syringe method for a very small area.
For the straw method, drill a hole one inch above the baffle flange in the center of the the leaking area. The hole size should be your straw size. Look, I know you don't want to commit drill to tank after all that work building it, but this worked great for me.
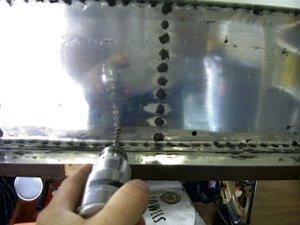
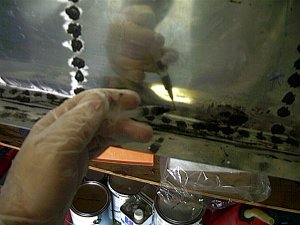
Mix some proseal up, and thin with M.E.K. to a warm syrup thickness. Suck it up a straw. Use a clear straw so you can see that black junk come up the straw, don't get this in your mouth, you'll probably die or something. Put the straw in the hole and slowly blow the proseal into the tank, while moving the straw around to get good coverage. Also tilt the tank up a bit so the proseal will move toward the baffle seal. Then move the tank around holding it over your head or whatever and that should do the trick. You repair the hole you drilled by putting a cover plate over it with a couple blind rivets and some more proseal. And wallah, your done.
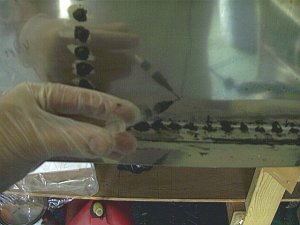
The second option option came from an idea from my R/C modeling days. I have a 1/5 scale F4U Corsair, very scale. One method for creating the illusion for rivets was the use of an el-cheapo syringe (can get from a crafts store) and elmers glue. You draw the glue into the syringe, and very carefully squeeze the glue out, making a drop every place you want a rivet. Its a very tedious process for several thousand rivets, but the syringe makes a perfect drop every time. So I grabbed an old syringe, and used it the same way I did the straw method. The only difference is the syringe hole required is very small, allowing a blind rivet to fill the hole afterwards.
One thing I forgot to take a picture of was drying the tank out. You need to get the M.E.K to evaporate out of the tank to get the proseal to dry. I took the fuel cap off, and rigged the air hose to the fuel line and left the air on for a day at very low pressure. Compressor would only kick on every 15 minutes or so. I knew when to quit by smelling the air coming out of the fuel cap hole. If I could smell M.E.K., I knew to leave it on longer.
The net result was the tanks are sealed with no leaks.
Last updated 11/05/2002