Once the firewall forward items come together, and the plethora of wires begins to punch into the cockpit, it is time to start taking the layout and committing drill to metal.
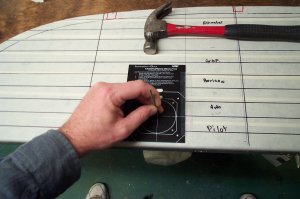
First thing to do is cover the panel in masking tape and take a big carpenters square and build grids. Run the square along the bottom flange and mark for vertical lines. Then begin placing items where you want them. Aircraft Spruce makes this nice marking tool and punch for proper spacing, and hole locations. This is a must have tool. Don't forget to take into consideration the vertical ribs on the top skin, as well as the side cutouts on the panel for the side ribs. Those ribs taper inboard and you loose clearance on each of these items as you move toward the firewall.
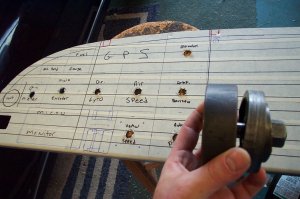
Next I borrowed from our tool department at my local EAA chapter, a panel hole cutter. It is more like a shear. You drill out the center hole in your instrument panel, then put this gismo on it. Put a wrench on one end of the cutter, and an impact gun (or ratchet would do) on the other end, and run the to nuts together. The cups on the cutter come together and basically shear through your panel and Whallah, a perfect hole. This tool also does the smaller holes as well.
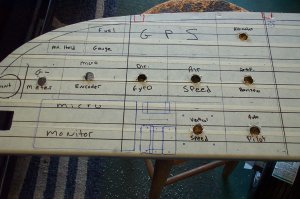
Here is the prep work done.
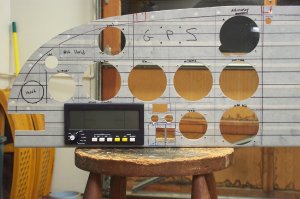
Here is the result.
Once the holes are in and you are ready to drill the retaining screw holes, be careful to look at each instrument. Some have funky special problems. The altimeter for example has a cut out required for the dial knob. So does my G-meter.
Square holes in the panel start with proper marking on the panel. Drill the four corners with a bit, then connect the dots with a cut off wheel. Little indicators, or the radio stack, the process is the same. Caution. It is easier to file metal away than it is to put it back so undersize the square holes and file to exactness.
On to
Last updated 11/05/2002