
Well this made it to the Uhhoo section. Not my fault really, the part does not fit well at all. After doing some further research, I found this is a common problem I heated, cut, bent and just basically destroyed mine before I found out that there is a guy who makes aftermarket ones. I tried reglassing areas and I just was not having very good luck. I wasted a full week on this before ordering a set from Bob. Cost is $115. 00 But the shipping is an extra 40$. UGGH!! Something about an oversized box.
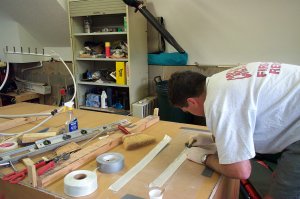
Here a a picture of me glassing the original one in. I was just not happy with the fit. Many builders have the same trouble. The flanges are flared up. And it just does not fit right. Also I have left thrust in my vertical stab to counter act the high performance engine thrust that many builders experience.
This did give me some practice on glassing. I could do better the next time around. But after reading through the RV lists, I am glad I ordered a new one from Bob. Plan ahead, lead time for me is 3 month's to get the replacement. Ill give more details on this when I get the new part and try and fit it in.
UPDATE 10/29/01
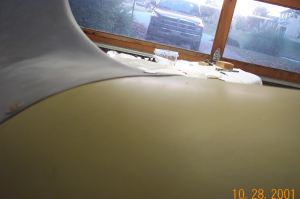
Well I bought an aftermarket tail fairing from fairings etc. . What a difference this made. Was easy to install and fit perfectly first time. No forming, no nothing. Amazing.
Here is how I installed it.
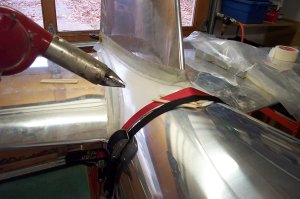
first, I felt that hitting the flanges for platenuts was going to be a bit hairy, so I first drilled the holes in the metal flanges first at #30.
Then I taped off the metal and used a ruler to draw a straight line from the center of the hole out 6 inches or so with the fairing off. The location of the line to anything other than the hole is not relevant. Just as long as the line goes through the center of the predrilled hole and you have a mark on the line 6 inches away from the center of the hole.
Then I slid the fairing on and used the line on the tape as a guide back to the hole that is now under the fairing.

Using a #40 bit first, followed to the right size with a #30, I drilled through the fairing into the predrilled #30 hole underneath, cleco as I go, and Walla, I hit every hole w/o exception and each hole is perfectly located on the flange between the existing rivets.
Then, with the fairing off, platenut as normal. This fairing is so much better than the vans fairing. Thinner, more flexible, and it fit right out of the box, even with my 2 degrees off center vert. stab.
last updated 02/03/2003